
In the third installment of this series, I wanted to share the story of another talented drum engraver, Mike Morgan. I met Mike in early 2017, having seen some of his interesting engraving on a Trick snare drum. As often happens these days, I connected with Mike online and began asking him about his style and approach to engraving. We eventually met up in person at the Chicago Drum Show, where he even brought his equipment and was engraving on site at the Trick booth. I spent a fair amount of time watching him do his handiwork. My admiration and interest in Mike’s engraving grew. Eventually, I decided to have a drum engraved by Mike, a 6.5 X 14” A&F raw brass snare. I thought the engraving would contrast nicely against the patinaed brass. I basically gave Mike free rein to come up with a unique pattern. In not so many words I said, “Surprise me…” Indeed, he pretty much blew me away with his design and artistry. He has continued to do so ever since.
I’d like to share some of our conversations in order for you to get to know Mike as I did, describe a few examples of his work, and also explain how his approach differs from that of other gifted hand engravers, like John Aldridge and Adrian Kirchler. This story is the result of a multi-year journey for Mike and me. I have thoroughly enjoyed learning about the craft and Mike’s unique insights on engraving. I greatly thank him for his patience in getting this compiled and written. As always, I welcome any feedback, questions and/or comments: fallendrummer@me.com

NSMD: Could you share a little about your musical background?
“I grew up in Rochester, New York. I started studying drums and percussion when I was 10 years old. I was fortunate to have been raised in a very musical family. My father is a singer and very much into the jazz standards. All of my uncles play instruments, so I was always around music. I studied drums, mallets, orchestral percussion, jazz and rock. I’ve never been a huge rock player. I enjoyed mostly jazz and funk. I went on later to study at the Eastman School of Music prep department (with teacher, John Beck, Principal Percussionist with the Rochester Philharmonic). Coincidentally, my lesson at Eastman was immediately after Steve Gadd’s lesson with John Beck. I would always go a little early just to hear some of Gadd’s lesson while I was waiting in the hall. Steve was quite a phenomenon even back in his twenties.
As an adult, I’ve always had professions that allowed me to travel. I took advantage of this situation and sought out teachers along the way, taking lessons with Vinnie Ruggiero (Miles Davis, Slide Hampton), Ted Reed (well known for his book, ‘Syncopation’), and Barrett Deems (Jimmy Dorsey, Louis Armstrong, Muggsy Spanier). It was an amazing experience. This was my musical education. My philosophy was essentially that I could always learn something new from each of them. I would also take the time to visit an art gallery or two. For me, it was either use the time for a lesson or go look at some art. In some places, there wasn’t much else to do!
In the mid-to-late 1980’s, I discovered vintage drum collecting. At one point, I owned a music shop in Rochester, called Bigg Boyz Music, that specialized in older drums and percussion as well as guitars and basses. I amassed a fairly good collection of vintage drums but eventually sold them off as adult needs came into play. They were always something that could be transposed into cash. My vintage collection is now gone except for one old Ludwig Black Beauty and a Vistalite. Most of my drums now are more modern and player oriented.”
NSMD: How did you develop an interest in engraving?
“I’ve owned a machine shop for a little over a decade and have made vaping products, turntable tonearms, and all sorts of things. It could sound like I’m all over the map without all the connective tissue. However, it all comes back to my love for creating things that either don’t exist or I think we can make better. That’s been the crux of the last 20 years of my life. In 1997, I got into a near-fatal motorcycle accident, and after that, changed just about everything about myself. Call it act two. I changed my focus to creating rather than consuming. Everyone should wake up each day and ask, ‘How do I re-invent myself…today, and make a bigger impact? Are you going to leave something behind?’ I love creating.
I have always loved the esthetic of engraved ‘things’. Many other household objects feature engraving, however. Silverware, jewelry, and other such items were a status symbol a few generations ago. Engraving and other forms of adornment has the power to elevate relatively ordinary items into the realm of high art, and the entire concept is really compelling to me. Nothing even comes close to the high level of adornment that takes place on high-end weaponry and armor. Engraved firearms, swords, knives, and accoutrement represent the pinnacle of the engraving arts.
One of things I love most about engraved drums, firearms, knifes, rings, watches or anything, is that you are adding ornamentation to a garden variety object. The ornamentation increases the likelihood of these items being around for centuries. It could get discovered 50, 60, 70 years later; the original Black Beauties are popular now about 100 years later! You know those drums are special the second you look at one. It just resonates that somebody put so much extra effort into it. Now the desire is to restore that, not to part it out, or send it to a landfill. Any drum, especially modern ones, can last for hundreds of years. However, is there the desire to keep those alive with hundreds of drum makers out there? With ornamentation, it’s no longer about a person, rather more so an idea and esthetic. It becomes instantly more precious. The early Black Beauties were not necessarily the pinnacle of drum design but stylish for that period. It cost a lot more money to get an engraved drum. Ornamentation is about taking an object that is relatively commonplace and turning it into something that someone, unknown to us and hasn’t even been born yet, will look at in 100 years and immediately cherish.
From the early Black Beauties and Leedy Elites, fast forward 50+ years when John Aldridge started engraving. It was all but a lost art, and he brought it back. He is forever embroidered into the tapestry of drums. You can even say he created a renaissance of engraved drums. He created a movement that changed the course of drum history. Anything he’s achieved, one could say it was against all odds. John became the name that so many people in the vintage drum community knew. He was not just a drum engraver; he was also the publisher of “Not So Modern Drummer”. He was on the masthead of one of the most important clearing houses for information about vintage drum collecting! In terms of guys that I admire in vintage drums, he’s right at the top. He doesn’t just talk the talk - he walks the walk. How can you look at someone like that and not admire the hell out of him? I also believe that Adrian Kirchler does some of the best wriggle work I’ve ever seen. His lines are razor crisp and exceptionally well-defined.”
NSMD: How did you then begin thinking about engraving drums?
“The Black Beauty was brought into my awareness by the Rob Cook books, which then led me to John Aldridge. The whole idea of ornamentation on a drum was really attractive to me. It took me a long time before I had an ornamental drum like a Black Beauty. When I first began looking, the time was pre-Internet, and they were really hard to find. I think it was 10 years ago that I finally got my first Black Beauty.
I always admired engraving but had never done any to speak of until recently. One day, I got the crazy urge to attempt to replicate the hand-engraved arabesque patterns that are common on firearms by using a CNC (a.k.a. Computer Numerical Control) mill. This was actually a really stupid idea because it took me so long to figure out how to apply the pattern onto a curved surface that I would never be able to break even on the research investment. I actually didn’t care about that, I just wanted to see if it could be done, and it can be… sort of. It turned out to be much more difficult than I imagined. It’s really more about the design than the execution. If you don’t design it well, regardless of how great you’ve executed, it’s not going to look good. I had to learn what scroll engraving was all about. There are rules that are sort of organic and have to be followed. I struggled with getting the ‘look’ of engraved metal. I could nail down the pattern. That was spot-on, although it just didn’t look ‘right’.
Over time, the machine engraving I was doing was catching the attention of people in the custom and boutique knife industry. A knife maker out of Texas, Mike Lovett, called me up and said, ‘This is cool what you are doing, but it will never emulate hand engraving. I want you to learn hand engraving.’ He explained to me that I would never be able to reproduce incision engraving with a rotary cutter. When somebody is hand-engraving, the cutter is stationary, and it’s literally slicing a slot in the metal. It produces a channel of varying width depending on pressure and angle which looks absolutely nothing like rotary tooling. Now, Mike had retired due to health issues and was no longer engraving. He said, ‘I’ll make a deal with you. I’ll send you my engraving tools, but you have to make the commitment to learn how to do it.’ I told him, ‘Challenge accepted!’
Once the tools were in my hand, I dug-in and gave it a go, and the results were disastrous. For several months, I could do little more than destroy the surface finish of metal. I started on YouTube University basically learning what was involved in hand engraving. I started looking around for online resources, and I discovered an online forum for engravers where I proceeded to ask a lot of questions. I also did a ton of reading and watching of instructional videos. I found that people were extremely willing to offer criticism. They were equally happy to serve up praise when improvement was evident.
Before too long, I became more proficient. Eventually I was doing work that I wasn’t ashamed to show people. It turned out that I had a knack for doing the design part correctly. A few famous engravers along the way began to show an interest in showing me how to cut properly. The design aspects were coming along nicely, but the cutting needed some help. Most of my earliest work was not on actual useful objects. I would buy sheets of brass, copper, aluminum, and steel and practiced incising them. It took a long time to get any level of consistency. I eventually got there. I would then go to garage sales and find old brass candlesticks, napkin rings and silverware. I finally got to a point where I could engrave reasonably well. I began engraving knives, guns, e-cigarettes, brass combs, money clips, and candle sticks. A candlestick is fairly hard to engrave. I engraved that stuff and put it on Etsy to sell. I also bought brass bolster knives on Amazon and engraved a pile of those. It took a long time to work up to engraving anything valuable. Eventually, I decided to try my hand at engraving a drum, and I wanted to bring my own thing to it. I also added about $10,000 worth of tools to the initial setup that Mike Lovett had gifted me. I was basically ‘All In!’


Up until then, drums had always been engraved using a method called ‘wriggle engraving’ (which is what John Aldridge and Adrian Kirchler use). I decided to try applying gun-style or banknote style engraving to a drum. This style occasionally happens on flutes but rarely anywhere else in the music industry. The inherent problem of engraving a drum is all the surface area you need to cover. A rifle has about 1/10th the surface area by comparison. A handgun or knife even less. A drum presents a huge surface to be engraving.
The wriggle method has been the primary way to cover large areas, because you can do it pretty quickly. You can paint with broad strokes. However, there is only so much detail you can get with wriggle engraving. You can engrave an entire drum in less time than it takes to do one panel (space between a set of lugs) with incision engraving, which I use. The level of detail you get with incision engraving can be unbelievable. If you add a technique called cross-hatching to produce even more detail, that just about doubles the time necessary. This then increases the price of such an engraving. My big decision as a drum engraver was whether to compete with the other wriggle engravers or keep doing what I’m doing (incision engraving), realizing that most people might not be able to afford the latter. In the last year, I’ve decided to just keep doing what I’m doing and not go into the realm of wriggle. There are already great wriggle engravers out there, like John Aldridge.”
NSMD: Could you describe your engraving method as compared to others?
“Wriggle engraving is done with a graver or burin, the French word for engraver (Wiki: ‘cold chisel’). The geometry of that tool varies. Wriggle engraving involves rocking the graver back and forth across the surface and down a pattern line. It scratches the surface and creates a very shallow cut. There are ways to cut a little harder and deeper, but it’s still very much a surface mark. It’s a fairly flat cutting edge. Wriggle engraving has traditionally been used on various musical instruments: trumpets, trombones, saxophones, tubas, banjos, and so on. It’s fast, beautiful, and relatively inexpensive to do with that much elegance. That doesn’t mean it’s cheap!
There’s an even less expensive way of engraving which is laser engraving. It’s just a computer marking the surface. There’s no craftsmanship to that.
What I do is called Incision Engraving. I first draw a pattern on the drum by hand using fine point sharpies or #5H pencils. If the drum is dark metal, I’ll put some white paint on the shell first so I can easily see the pattern. I actually design the pattern on my iPad Pro and print it first, then I use that as a reference to start drawing it on the shell freehand. When I draw the pattern initially, I only draw just the outline. I never draw the shading. The shading and inner leaves and such happen after the outline is done. Then, I use a pneumatic engraving tool called a Lindsay AirGraverÒ (www.airgraver.com). It has a cutting tool that is shaped more like a pointed chisel. I use the tool to incise the marks with a depth to them. So, rather than just scratching across the surface, I am removing metal and making a cut. This allows me to put lines much closer together and make very, very fine lines. I can remove more metal if I want a line that is a deeper channel to create more detail. This is very different than wriggle engraving. Firearms are often engraved in this way although some are enhanced by a combination of wriggle and incision engraving. Unfortunately, with wriggling, the permanence is not very good; the wriggles can eventually wear through over time. With a Black Beauty, the contrast of the plating enhances your ability to see the engraving. If you use bare metal or strip the black nickel plating, the marks are much harder to see. If you polish the drum, the marks just about disappear. Incision engraving is far more permanent.
There are a few different ways to do incision engraving, and I employ a combination of them depending on the circumstances. One is called ‘Hand Pushed’ which means you’ve got the engraving tool in your hand and use your own muscle power to push it through the metal. The other method is ‘Hammer and Chisel’ which is what you do when you are cutting steel and hard metals. You mark the pattern on the object and literally hit the tool with a hammer to push it through and make the cuts. Then, there is ’Air-Assisted’ which is what I primarily do. Basically, it’s like the Hammer and Chisel method without the hammer. It‘s a little jackhammer small enough to fit in the palm of my hand. People sometimes think it’s vibrating, but it’s really hammering. It’s a linear hammer capable of incredible resolution.
The cutters have to be fashioned into shape by grinding bits of tool steel into the appropriate geometry. If an engraver never masters this detail, they can never really become an engraver. Learning how to grind and sharpen the cutters is literally step one in learning the craft. There are several specific geometric shapes that have to be mastered because each geometry produces lines of varying widths and reflectivity. This is an essential part of the process.


The tools are a real barrier to entry into becoming an incision engraver. These tools are very expensive. With incision engraving, I’m looking at the work through a stereo microscope because that’s the level of resolution I can achieve using this method. The better I can see the work up close, the more detail I can apply to the work. I need magnification to get the fine lines close enough together to produce the shading effects I create. I’ve got the distance between the objective lens of the microscope and the surface of the drum to work. That’s about 5 inches. On fully custom designs, I go another few more levels of detail, increasing the microscope magnification as I go. I add fine shading, which creates even more depth and, when the budget is unlimited, I add drop-shadow. This creates the illusion that the design is floating above the metal slightly. The super detailed drums take between 80 and 100 hours to engrave, and the price isn’t for the timid.
The Lindsay Palm ControlÒ air engraver is over $3,000 for just the one tool with its associated regulator. When I was in Chicago for the drum show, I brought three different AirGravers (for more info: https://www.airgraver.com/Lindsay-AirGraver.htm). The Palm ControlÒ is what I use most of the time. Another one is the Classic AirGraverÒ. It is the same size, but it punches harder using a tungsten piston and uses a foot control. I use that for a stippling effect. Then I’ve got an Artisan AirGraverÒ which makes lighter hits and is used for really fine detail. The total cost of just those three tools, not including the compressor and microscope, is about $7,000, as opposed to wriggle engraving where price of entry is about $100. That being said, whether it’s $100 or $7,000 doesn’t matter if you don’t spend the time to learn the techniques needed. The tools won’t do it for you automatically. I keep examples of my early work around to remind myself how difficult it was to get over the learning curve.
I’ve become a member of the Firearm Engravers Guild of America which is a very supportive group big on educating newcomers. I first came into it in my late 50’s and didn’t exactly qualify as new blood. They’re really anxious to teach people in their 20’s and 30’s so they can actually get some longevity. Unfortunately, hand-engraving is dying off. There seems to be fewer and fewer people that can or will spend the money on that level of ornamentation.”
NSMD: Your engraving seems stylistically quite different from the traditional wriggle engravers. Could you explain why?
“Guys like John and Adrian can reference from the historical record as what has already been engraved on drums. They can create their own original patterns that are based on designs that they know already work well on a drum. I don’t have that luxury. I can’t really mimic the Ludwig or Leedy Elite. Their work is beautiful, and I like it. It’s fantastic. However, I have to find ideas from a completely different set of disciplines that might be applied to a drum. If I copy those historical wriggle patterns with incision engraving, they would look flat and lifeless. It’s the broadness of the line that creates the flow with wriggle engraving. I don’t have the luxury of producing a broad line. I incise really fine lines. I have to find something that has a lot more detail, or there’s really no point to engraving with this style.”
NSMD: How do you come up with ideas for patterns?
“In many cases, I look to the past for ideas, but I rarely look at musical instruments for inspiration. I have to admit that the scrollwork patterns on firearms were my earliest points of departure. I also love finding patterns in carved wood furniture. The Arabesque and Rococo patterns of early Philadelphia and Boston furniture just blow me away, and I’ve pulled inspiration from that. In architecture, I look at concrete work and stone carvings. One walk through the grand hall at Union Station in Washington, D.C. can provide a lifetime of inspiration, and the US Postal Service spent a king’s ransom on architectural details. The bronze work in the old turn-of-the-century post offices can be stunning.
As far as I know, I’m the first guy to approach drum engraving using this method, so I get to take a few liberties because I’m not constrained to having to make it look like the traditional methods. I have a ton of engraving ideas that I will eventually try. I love the idea of utilizing the drum as canvas for art engraving; this would be a real departure from the idea of repeating patterns. Reach in your wallet, pull out a 20-dollar bill, and take a really close look at it. Every line, every detail and nuance, except the serial number, was first-hand engraved in reverse on a metal plate using the exact same methods I use. The guys that make our currency are called ‘The Bureau of Printing and Engraving’ for a reason!”
NSMD: What was your first engraved drum?
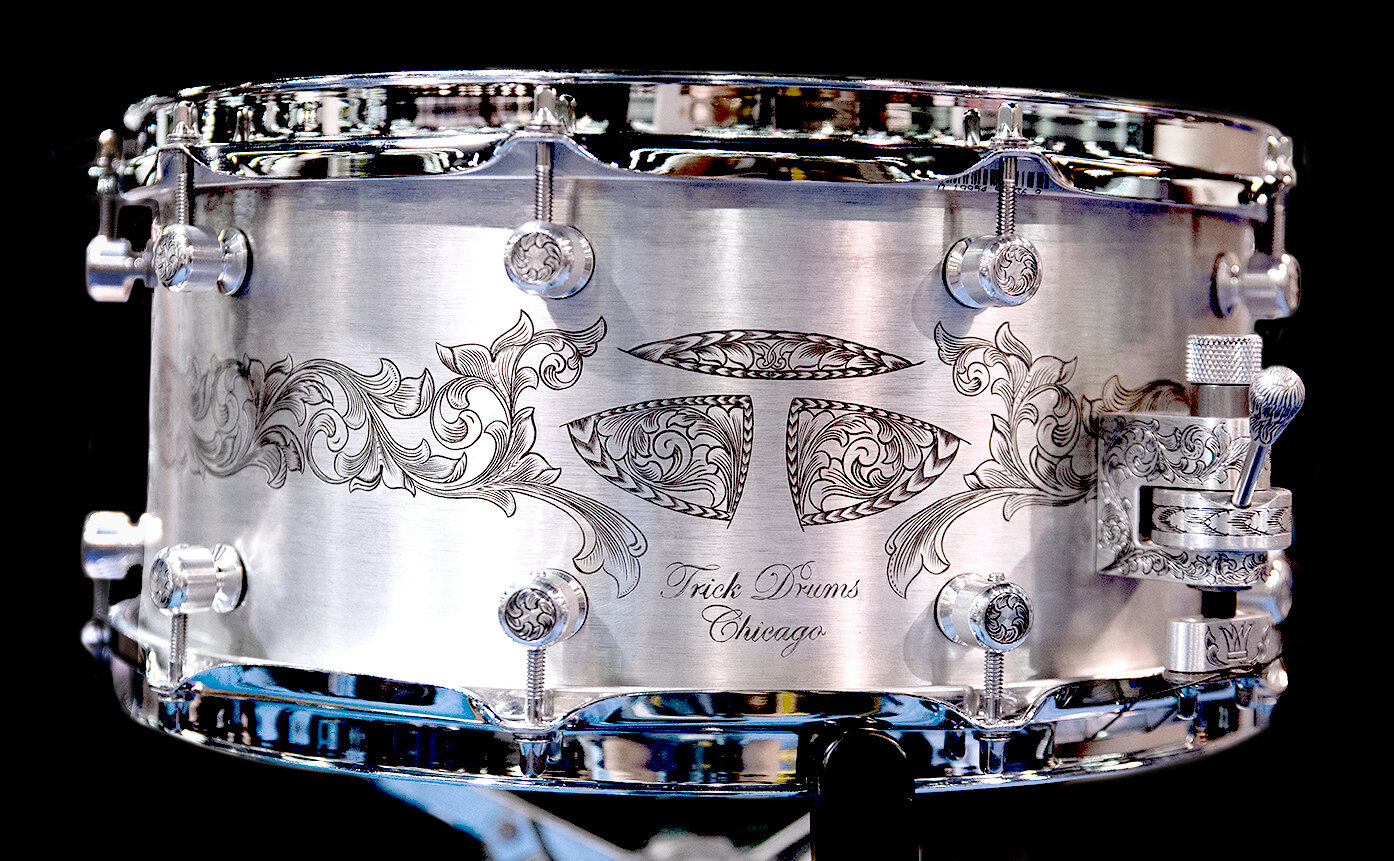
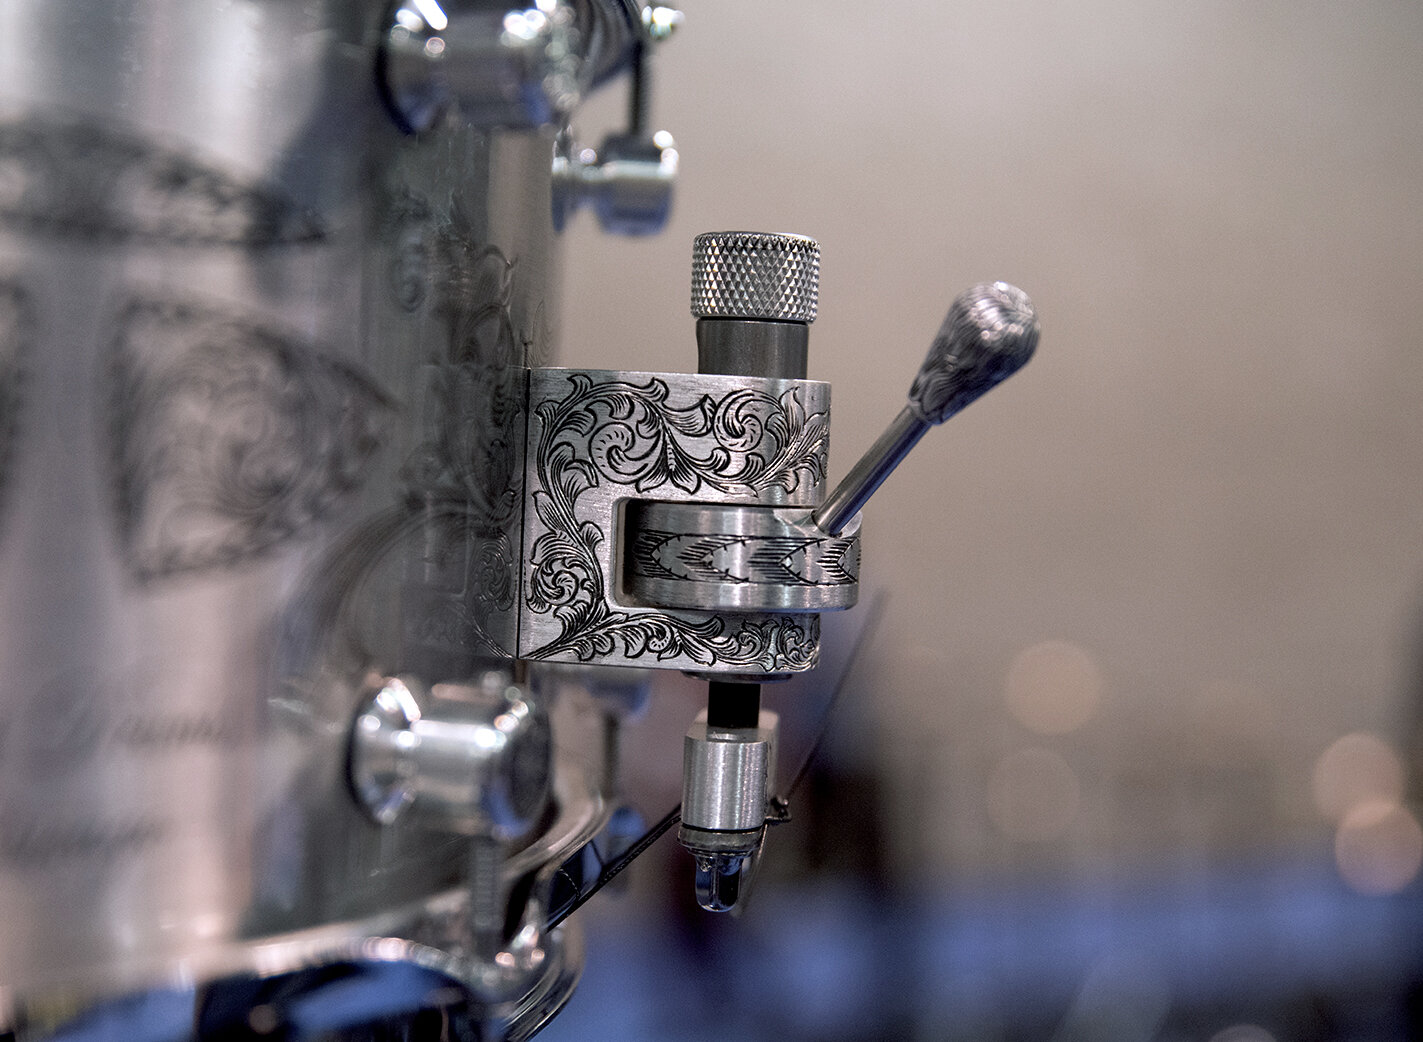
“I own and play several Trick drums, so I contacted Mike Dorfman, founder of Trick Drums USA. I told him I wanted to try engraving one of his drums. The rest is history or hopefully what will become history. The first time anyone saw a drum from me was when Mike posted a picture of a Trick snare with engraved shell, lugs, and throw-off that was displayed at the 2017 Winter NAMM show.
There’s a gun engraving pattern that goes by a lot of names, based on the classic Nimschke scroll. Let’s just call it ‘scroll & leaf.’ What I was after with the Trick drum was to do a simple scroll & leaf design around the perimeter of the drum. Then, I wanted to apply the same technique to the rest of the drum: get the leaf onto the lugs and scroll & leaf to the throw-off and butt plate. However, I was used to making that same pattern about 1/10 the size! To bring that pattern up to drum size meant increasing the resolution or increasing the size of the shading lines so that scaled properly. My main goal was to emulate the scroll & leaf, and I’m pretty happy that I captured that vibe.”
NSMD: Not too many people, other than maybe Adrian and a guy named Jasin Carlin, will engrave lugs like you did with the Trick snare. I assume this is quite difficult. What motivated you to attempt lug engraving?
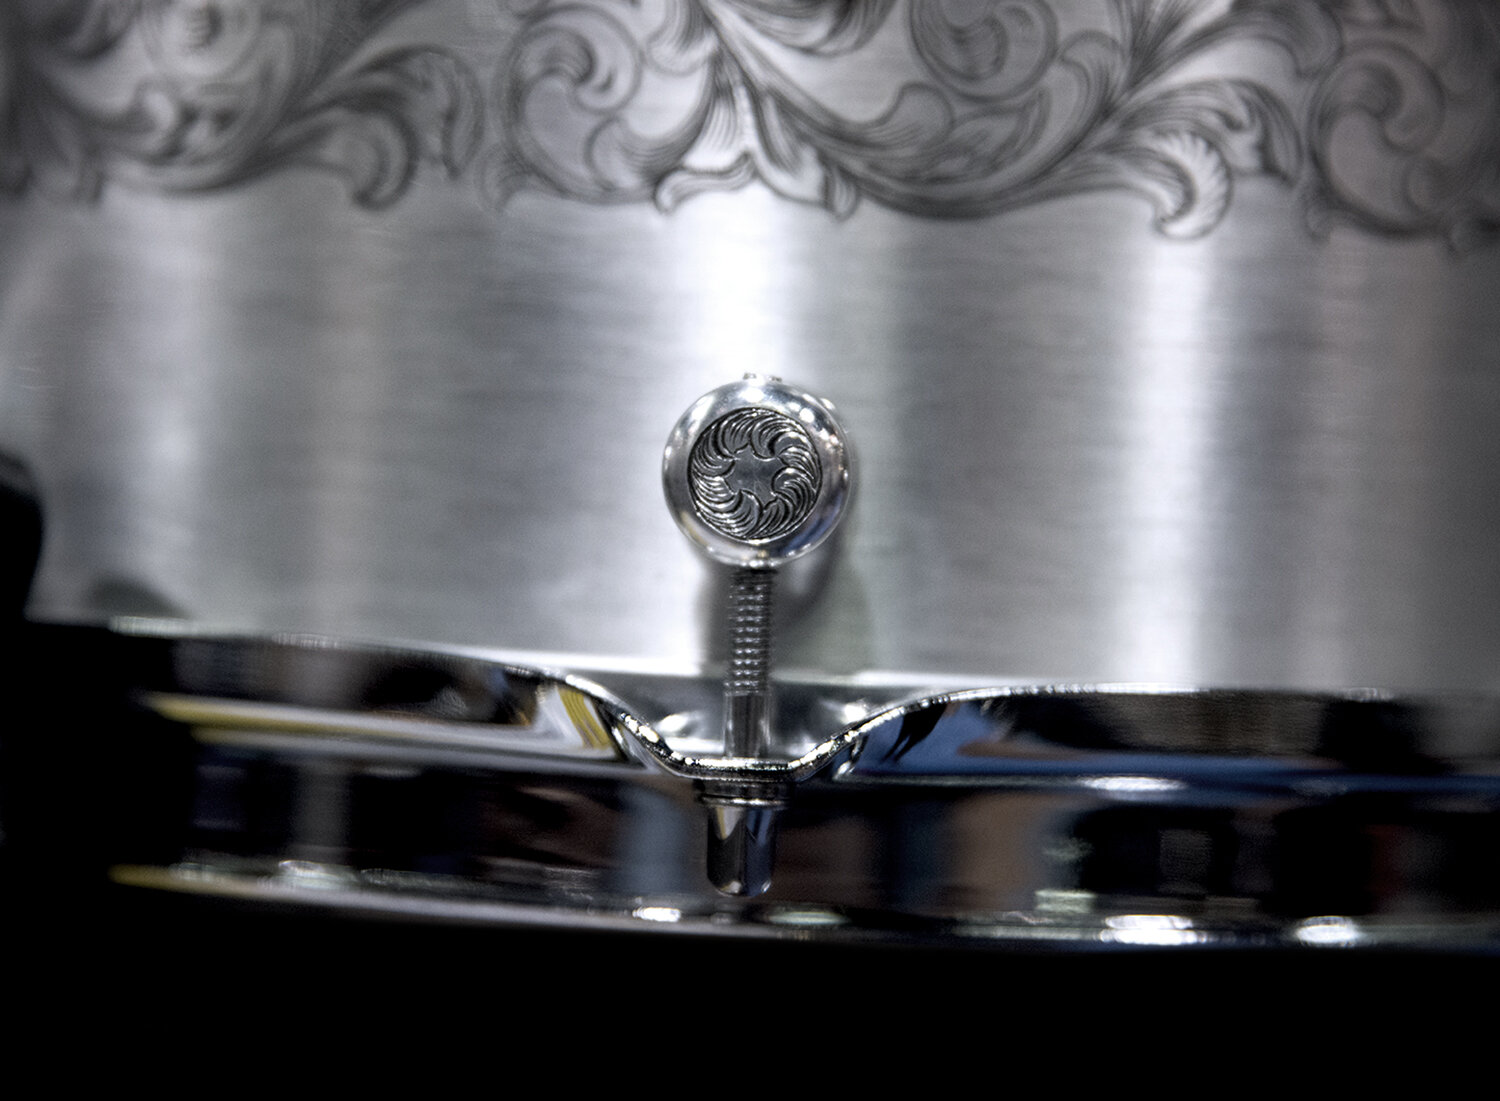
“Why did I engrave lugs? - because they should be! (laughs) Don’t you see some of these old drums and say, ‘Boy, I wished they had engraved these lugs’? Lugs can be engraved and should be engraved. To me, lugs are the logical next thing to engrave. Working with Ronn Dunnett, we did some drums where I engraved only the lugs. I also did a set of lugs for Bruce Hagwood of RBH drums that ended up on a cherry wood shell, and the drum is spectacular. For a modest price compared to shell engraving, you could have engraved lugs. That would bring so much to that drum, even if you did nothing else. Hoops are also relatively easy to engrave and not that expensive. The goal of engraving is not to make it expensive but to make it exquisite. All that counts is that you’ve made it special.
For me, lug engraving required a sort of special fixture to hold the lugs in place, and I needed to custom fabricate that. My microscope was also an advantage working in such a confined space. If I can see the area, I can engrave it. For wriggle engravers, this can be quite a challenge. It’s not a broad sweeping pattern, and how would you see what you are doing? The microscope offers you that luxury.”
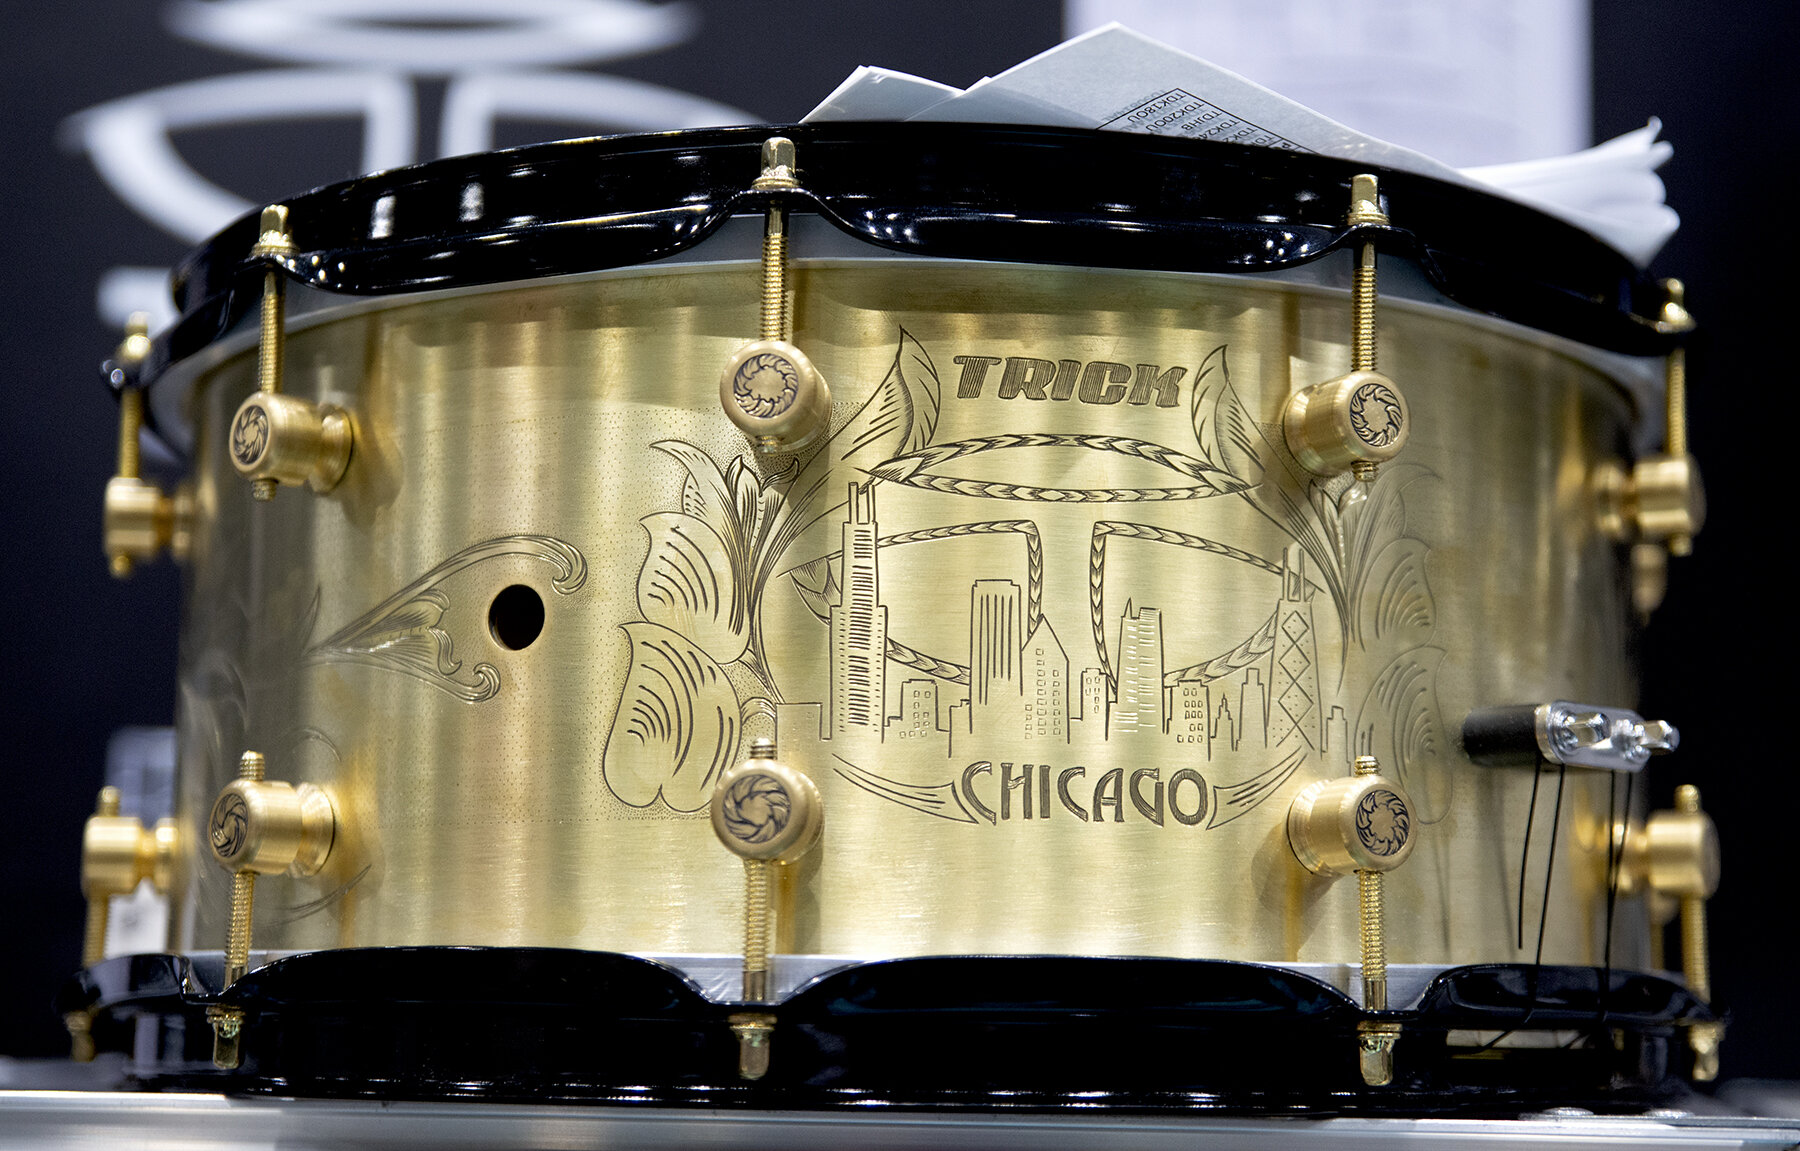
NSMD: Tell us about your next drum that you engraved for Trick which was displayed at the 2018 Chicago Drum Show?
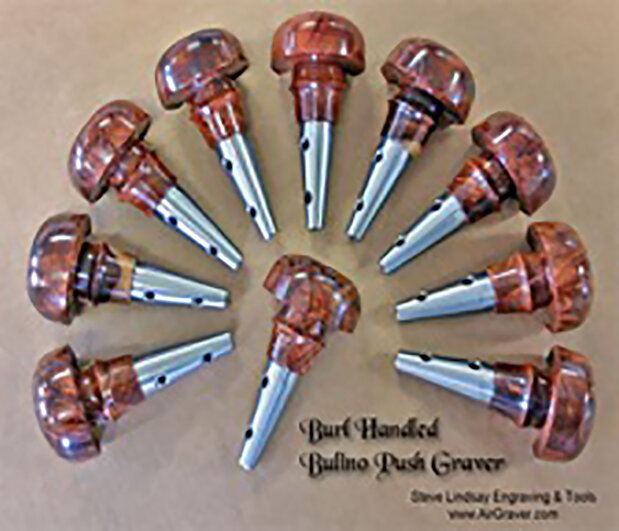
“The next Trick drum I engraved for the 2018 Chicago Drum Show was a whole other animal. The pattern was done on a way bigger scale with regard to the underlying scrolls, something that had not been done before on firearms. This is stuff that’s done on large bronzes; a style called ‘black leaf’. On the original aluminum Trick drum, each scroll was about 1 ¼” long. On the second brass Trick drum, each scroll was a panel and a half long. It’s monstrous by comparison. The drum has three main scrolls, with two opposing each other and the third in mirror with it facing the other direction, plus the skyline of Chicago. In areas that are not specifically incision engraved, I’ve created a background which is a ‘bulino’ shading*, like pointillism with dots poked into it. It will shade a panel with dots poked in by hand one at a time. It takes a lot time to do. About 80% of this drum is engraved in some way, from the center point of the top lug to center of the bottom lug all the way around.
*Bulino Dot Engraving: A means of producing high definition images by means of micro dots, created by pressing a tool tip of specific shape into metal. A small barb of metal is raised. Some remove this, and others retain it. Each produces its own specific effect, but the principal goal is to create a shadow. Source - http://www.engravingarts.net/Glossary2.html

NSMD: You also engraved a Trick snare for Tim Klitzman of Oil Can Harry?
“This was a 6.5 X 13” blue anodized aluminum snare drum. I engraved that drum in its entirety at the Chicago Drum Show. Tim came to the show on Sunday. I left the placard area open and had him sign the drum with a sharpie. I then cut the signature into the shell. The idea was to have one side with his band logo on it. On the other side, I mimicked that shape and put his signature within it. I also engraved his signature on a Trick drum key.”


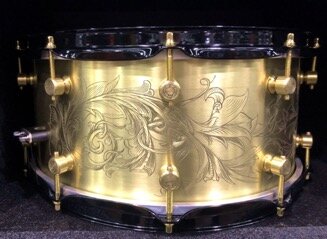
NSMD: Tell me about the engraving the brass A&F snare drum?
“This drum intimidated the hell out of me for a lot of reasons. The Trick drum didn’t intimidate me because it was 1/8” thick. I could really lean into it and know I wasn’t going to cut through the other side. The tools will cut that deep. It was very solid and wouldn’t flex underneath my graver. That way, I could make very clean cuts. It (the Trick drum) was also just a raw aluminum shell when I engraved it. If I made a mistake, I could just get out the sandpaper and actually sand it out. That’s a luxury I don’t usually get. Normally, if you make a mistake, you have to incorporate that mistake into the pattern. On repeating pattern, that means you have to do it 10-12 times. The Trick drum was a worry-free experience.
Then, I got sent a patinaed brass A&F drum from you. I’m thinking, ‘I think this drum will be very, very special when it's done. Hell... it's special before I even start! These drums are spectacular instruments!’
I had already begun the brass Trick Chicago themed drum. Again, it was just an unfinished brass shell, and I could do whatever I wanted. Just knowing I could make a mistake and correct it, like the first aluminum Trick shell, was comforting. Now your drum arrives, and it’s about 1/3 the thickness or less. It’s flexible under my tools. It’s got a patina, that if I even bump into, it leaves marks. That meant I couldn’t rest the engraving tool on that drum if there wasn’t going to be a mark there. If I just touched it, it would have marked it. That was really intimidating.
Also, on the Trick drum, there were separate lugs top and bottom. On your A&F snare, it had center-mounted lugs. For an engraver like me, that meant I couldn’t do a pattern that went all the way around the shell. I had to create individual vignettes for each segment. That was a much bigger design challenge. I went back and forth with about twenty different ideas before I felt comfortable with something to present to you. My first design kind of curled up over the lug and flowed into the next panel. I decided that wasn’t going to look good over time. I found an ornamental architecture site on the web that I adapted for this pattern: https://www.castledesign.com/appliques/appliques-cra99-acanthus-shell/. I went to my iPad and started drawing a design that reminded me of that shape. It wound up being a Victorian-meets-art deco pattern with kind of a Wizard of Oz appeal. I honestly loved how the pattern came out.

This was the starting point for your engraving design... I based the whole thing on this architectural piece (Acanthus Shell) and evolved it from there. This then evolved into the final pattern that I ended up drawing on the drum before engraving.

For the lug engravings, I went with a curling leaf pattern that I feel compliments the main panels of the drum pretty well. The lug surface was absolutely perfect for that nice little touch. The hoop engravings have a flourishing intertwining leaf feeling to them which I really like. The pattern was developed for that drum, so I probably won’t be doing it again… I like the idea of this A&F drum being truly one of a kind, so pretty much everything I did on that drum will not end up recycled on another drum.

NSMD: What was the idea behind the design of the Double Lotus Flower engraved Dunnett 2N brass snare drum?
“Most of the art in my house is Asian. I collect Asian work, like the Japanese artist, Hisashi Otsuka, who does beautiful kimono patterns. I’m always looking for Asian paintings on silk. That’s the art that I favor in my life. If someone sent me a drum right now and said, ‘Do whatever you want,’ I would do an Asian themed design with geishas, cherry and lotus blossoms. I started playing around with the lotus flower idea and was looking for the right canvas to put it on.
Ronn’s brass 2N shell showed up in late 2019, and I said, ‘This is the one.’ I decided to do a lotus blossom on each panel. It was a risk. There was no way of knowing whether Ronn was going to love it or hate it. It wasn’t what he was originally looking for. It was the first drum I engraved for him and, ultimately, he allowed me free reign. I left the drum high-polished where the engraving was, then masked off and brushed the rest of it. It gave it a burnished look. We were trying to get it done for the Winter NAMM show (Jan, 2020) but wound up a few days short for final assembly and shipment to the show. So, it was never shown at NAMM. Ronn said that it would be the centerpiece for the Drumeo Festival in Vancouver (Feb, 2020). I said, ‘Cool!’ Then he said, ‘Can you can get the titanium drum done too?’ I told him that I made no promises and would give it a shot. The titanium wound up being brutal. The brass was so soft, and the titanium so hard. Since I did them back to back, it was a serious contrast.”

NSMD: Tell us more above engraving the titanium Dunnett snare drum. According to John Aldridge, titanium shells are almost impossible to do by the wriggle technique. How did you accomplish this?
“In November of 2018, Ronn Dunnett gave me a titanium shell to engrave. When I first got the drum, I put it in the vise and tried to run a tiny little test incision under one of the lugs. It was hard! I mean it was really brutally hard. A real cantankerous metal. To make matters worse, it was slippery. If you didn’t have exactly the right angle coming at it, it slid right off and out of the groove. I can’t imagine how John was ever able to wriggle one of those things.
It intimidated me so badly that I put the engraving on hold in order to practice engraving on titanium scraps that I got from my local metal supplier. I tested about a dozen different graver geometries until I found one that would do the job without slipping out of the cut. For the engraving geeks out there, this would be a modified onglette shape with a steeper face angle with heels at the very tip, but not extending up the full cutting edge. This shell spooked me. Ronn was like, ‘When you feel comfortable doing it, do it. Just hang on to the shell, and one day you’ll feel brave and you’re going to do it.’ He was very understanding.
After a year had gone by, I finally worked up the nerve to begin. I designed a scroll pattern to put on this shell and commenced with the scratching. I went with a wave scroll and kept it simple. Having to stop to re-sharpen the graver bit (M42 tool steel) every 15 to 20 minutes sure does knock ya out of the groove (pardon the pun), but that forced me to take breaks so I wouldn't get too fatigued... always a good thing! Interestingly enough, the shell was so resonant that it rang the whole time I was engraving it. I ended up listening to music using my in-ears because the engraving process was so loud, I couldn't hear my speakers... plus, added hearing protection! No lie, that shell rings like a bell - a REALLY loud bell.
About a week later, I finished the engraving and shipped it back to Vancouver. That was the drum that took me over a year to engrave! I was very happy with how it came out.”


NSMD: Where do you want to go in the future with your engraving?
“I like doing small runs and direct to consumer work. I’m open to doing contract engraving like I currently do with Trick drums. I’m really proud of the Trick engraved snare, which is available at Sweetwater music and Drum Center of Portsmouth, because I worked up a pattern that has a real signature look to it and can be done in a reasonable amount of time. This means the price remains affordable at $999.00. It’s also a real sharp looking drum because the silver aluminum really pops through the black anodizing. There’s not a lot of hand-engraved snares available in that price range, for sure. The drums I’ve done for Ronn Dunnett have been one-offs. The patterns I created are exclusively for use on his drums, so I’m open to repeating them in the future but, as I said, only on his drums.

I think if one of the bigger drum companies contacted me to do an edition with larger numbers, I would seriously consider it, although I highly doubt it will ever happen. Wriggle work seems to be so much more affordable for that sort of thing and is certainly more widely accepted as ‘the way drums are engraved’.”
NSMD: “Thanks so much for sharing your knowledge and experience. Do you have any closing comments?”
“I engrave drums the way I do because I know it's going to be loved by somebody for the next couple hundred years at least. Owning an engraved drum, no matter who did the engraving, isn't really ownership. It's historical stewardship. At this point, I’m really big on helping others that are trying to get started because people have been so willing to be generous with their time when I needed it. I gave one of the tools that Mike Lovett gave to me, that was made in the 1890’s, to John Aldridge’s son, Lucas, at the Chicago drum show three years ago. I hope the tool means as much to him as it did to me!”
Testimonials:
Ramy Antoun (A&F drums): “Mike’s work is great! When I look at the A&F brass drum he engraved, the pattern just reminds me of all things spring, like blossoming flowers and baseball!”
Bob Campbell (Collector, contributing writer/photographer - MD & NSMD): “I sent Mike a naked brass 6.5 X 14” A&F drum. To him, it was a blank canvas. I say to him, Surprise me, ’ and he did. It came back a masterpiece. What I love so much about this engraving pattern is that I think each person sees something different when they gaze upon it. It evokes something primal in each of us. It’s almost kaleidoscopic. From my perspective, I see an Asian man’s face with a long, curled mustache looking back at me. Mike is truly a master at incision engraving, and his creativity seemingly knows no bounds.”
Mike Dorfman (Trick Drums): “In addition to working with Mike professionally on engraving for Trick’s drums, I have become close friends with Mike, and let me say, in addition to his impressive engraving skills, Mike is also a profoundly talented drummer as well as a brilliant engineer and critical thinker. Mike Morgan resides firmly in the asset column of humanity and the arts.”
Ronn Dunnett (Dunnett Classic/George Way): “In my 30 years of building drums, I’ve been fortunate enough to work with artists of many different genres, from Daniel Johnstone, to James Trussart and James Michels, to John Aldridge. Each of these has taken their art form and, by virtue of their own individuality, shaped it into something that cannot really be defined as mere “engraving". Indeed, their names define their work, and Mike Morgan is one of the best examples of this that I can think of. Having admired his work since I was first introduced to it at the Chicago Drum Show, we quickly became friends who shared a number of things in common - hobbies, philosophies, and a deep love of common sense! I didn’t ask Mike to engrave a drum for me immediately - I felt I had to work up to it by getting to know him a bit better. When I did, it came by way of a series of long discussions about ideas. My idea was simple: I trust you - a blank Titanium canvas. I prefer that approach, because as beautiful as it is to pay homage to the design of the past, creating new “classics” - well, that is what I do. On a recent project, I had asked Mike to do something like that - just a simple rendition of a florette a’la Ludwig. His reply was ‘I don’t do simple’. When I looked at the pieces that Mike has done for me, I realized how right I was to trust my gut. His work is sublime, even when applied to the commonality of a 6.5 x 14” drum shell. He just has that rare ability to read a canvas before he ever puts a graver to it.”
John Aldridge (Author, historian, drum tech, engraver): “I’ve known Mike Morgan for almost 25 years. He is a stickler for perfection and a pioneer in machine assisted hand engraving on Drums. If I was a bit more precise, we’d be twins (although I would be the prettier one).”
Dunnett engraved snare pics courtesy of Ronn Dunnett (many thanks!)
Mike Morgan can be reached at: mgraving.com (“Go ahead, be exquisite!”)