
Originally published Winter 2010


Trauma Center: Extreme Drum Repair
In my years of repairing musical instruments and equipment, I have at times seen the extreme cases of abuse, neglect, and misfortune that occasionally seem to plague the equipment of the working musician as well as the hobbyist. The most extreme cases of damage and desecration usually have the best stories attached to them, generally involving alcohol, jilted spouses, angry club owners, and/or lapses of sanity. I won't say I've seen it all, but after 25 years it's hard to surprise me. These repairs are, however, some of the most gratifying to do, mainly because it's a no-lose situation. If the instrument can be repaired, I'm the hero; if not, no one is surprised or truly disappointed, because the damage is already done.
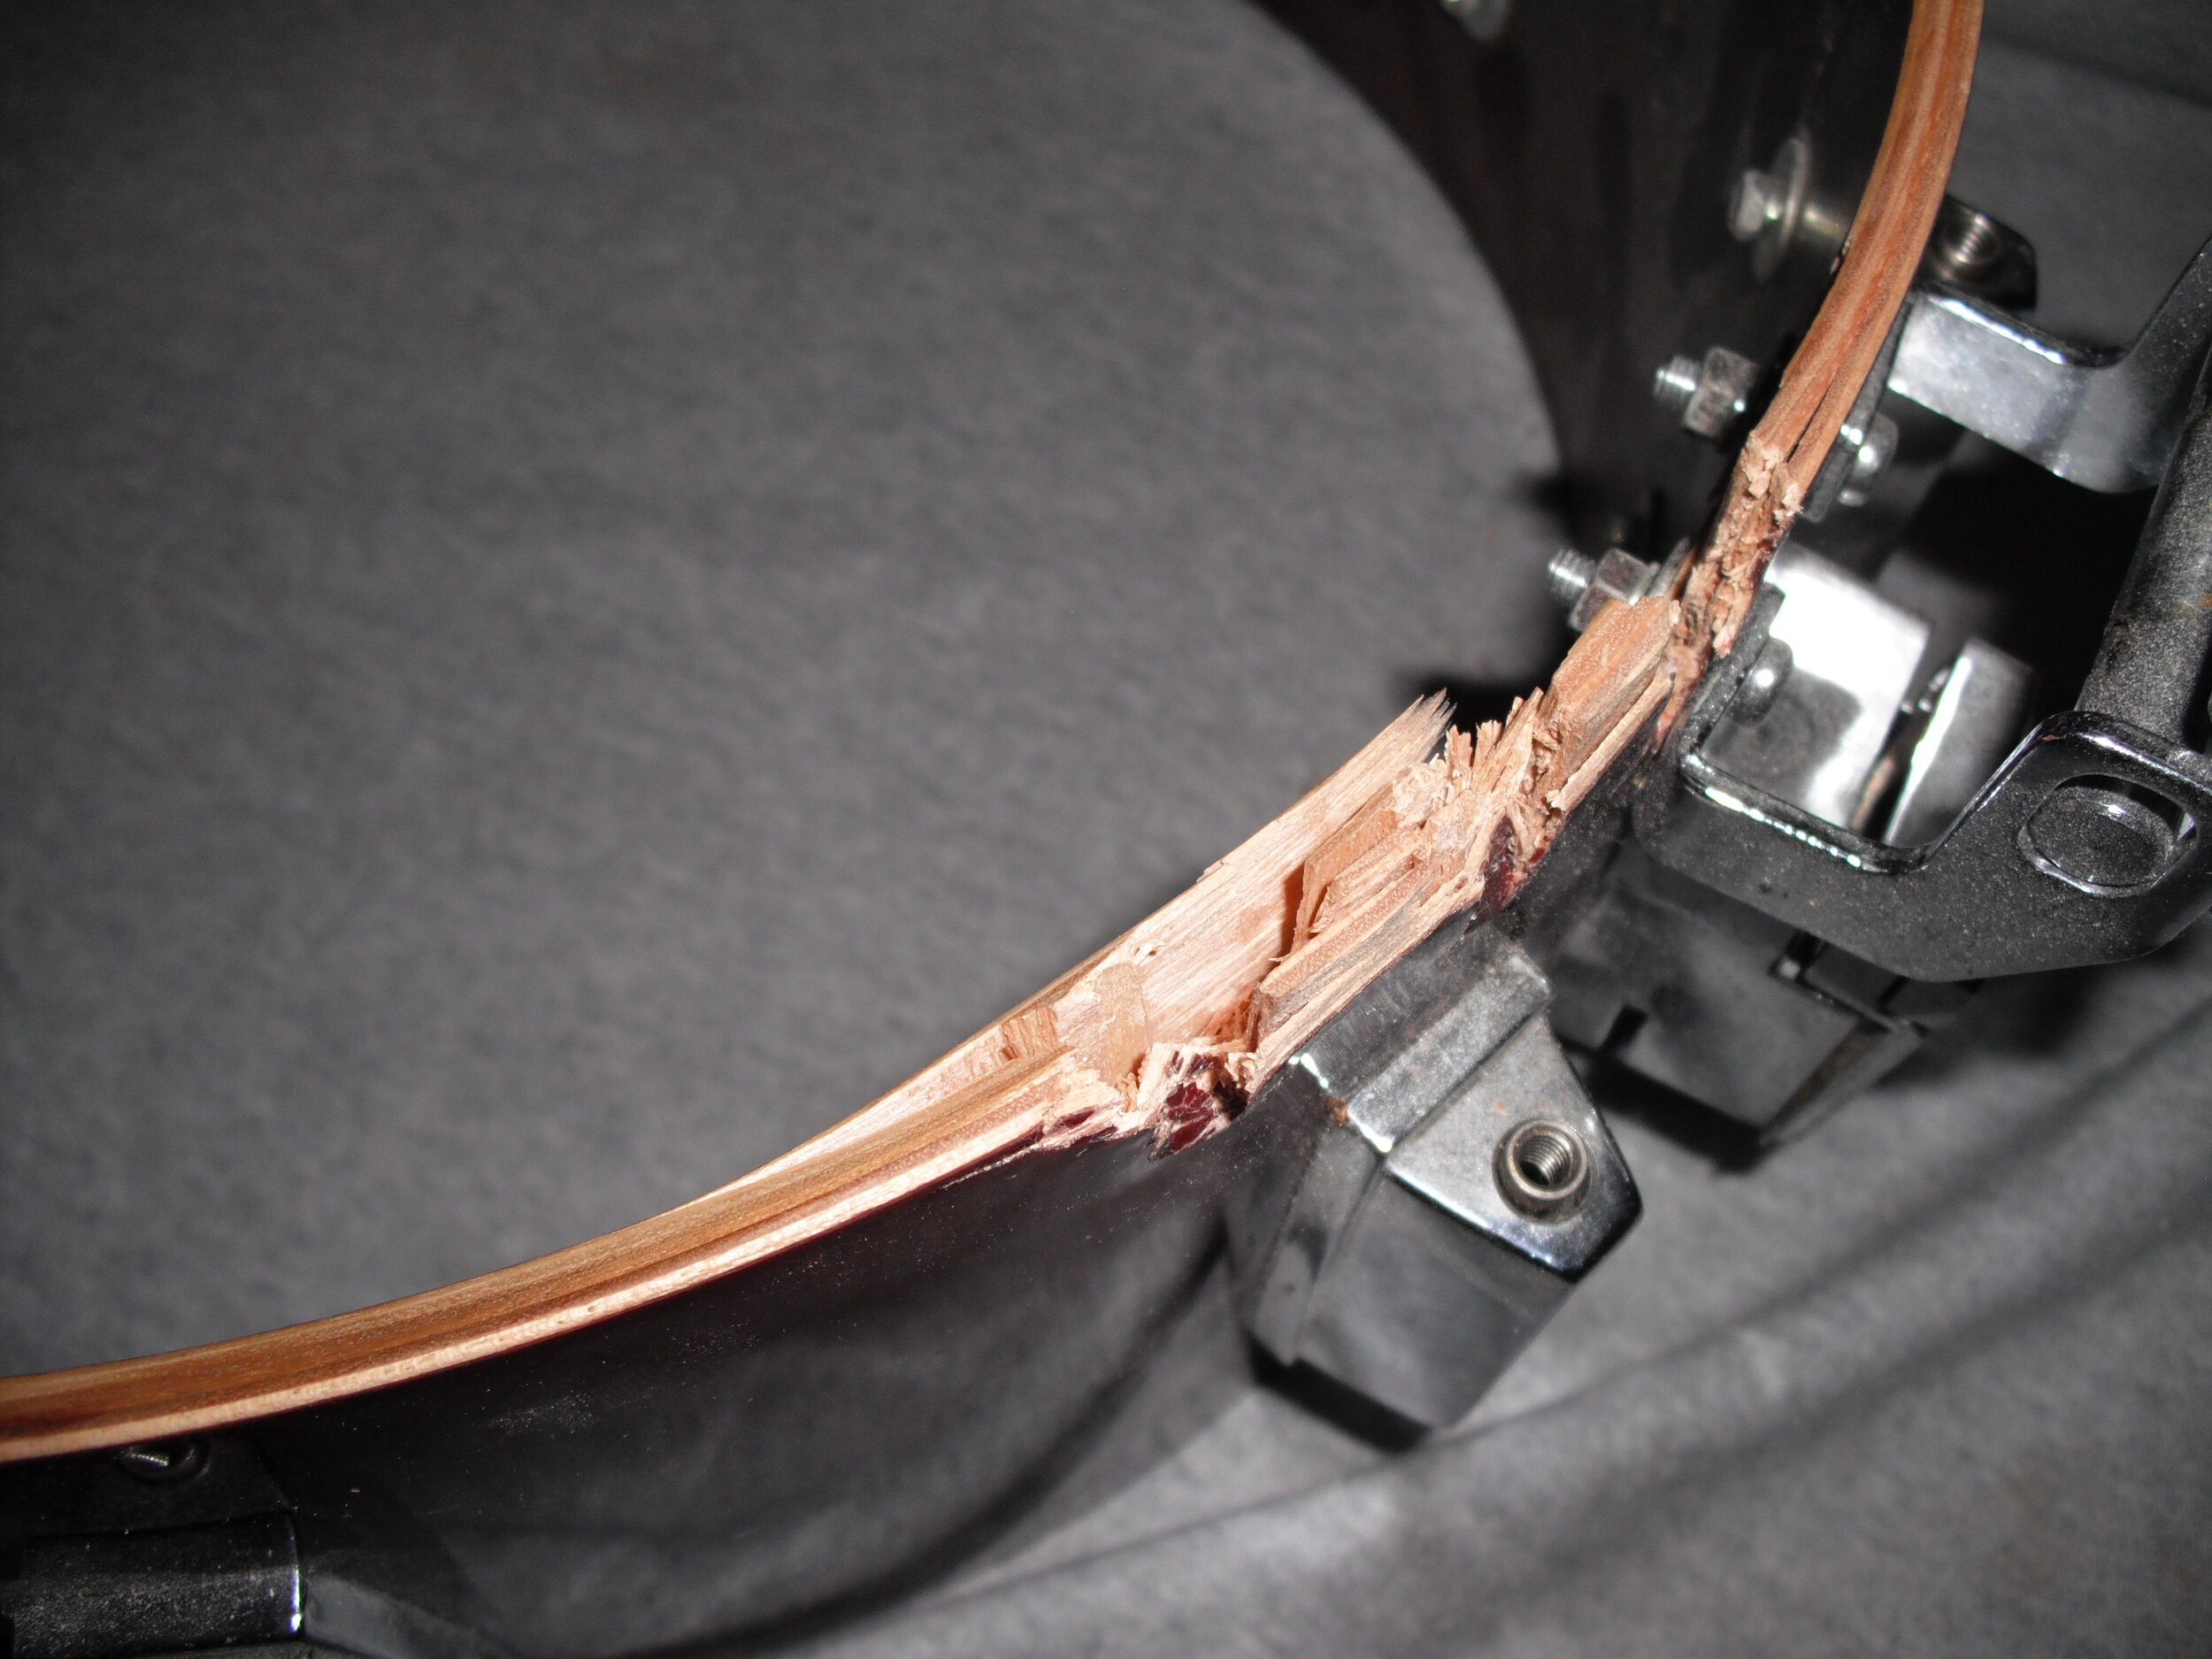
The drum I recently received for repair likely falls into at least one of the above catagories. The details of this damage were, as I was told, "of a personal nature," so I can only speculate as to what happened. Rest assured, it was violent.
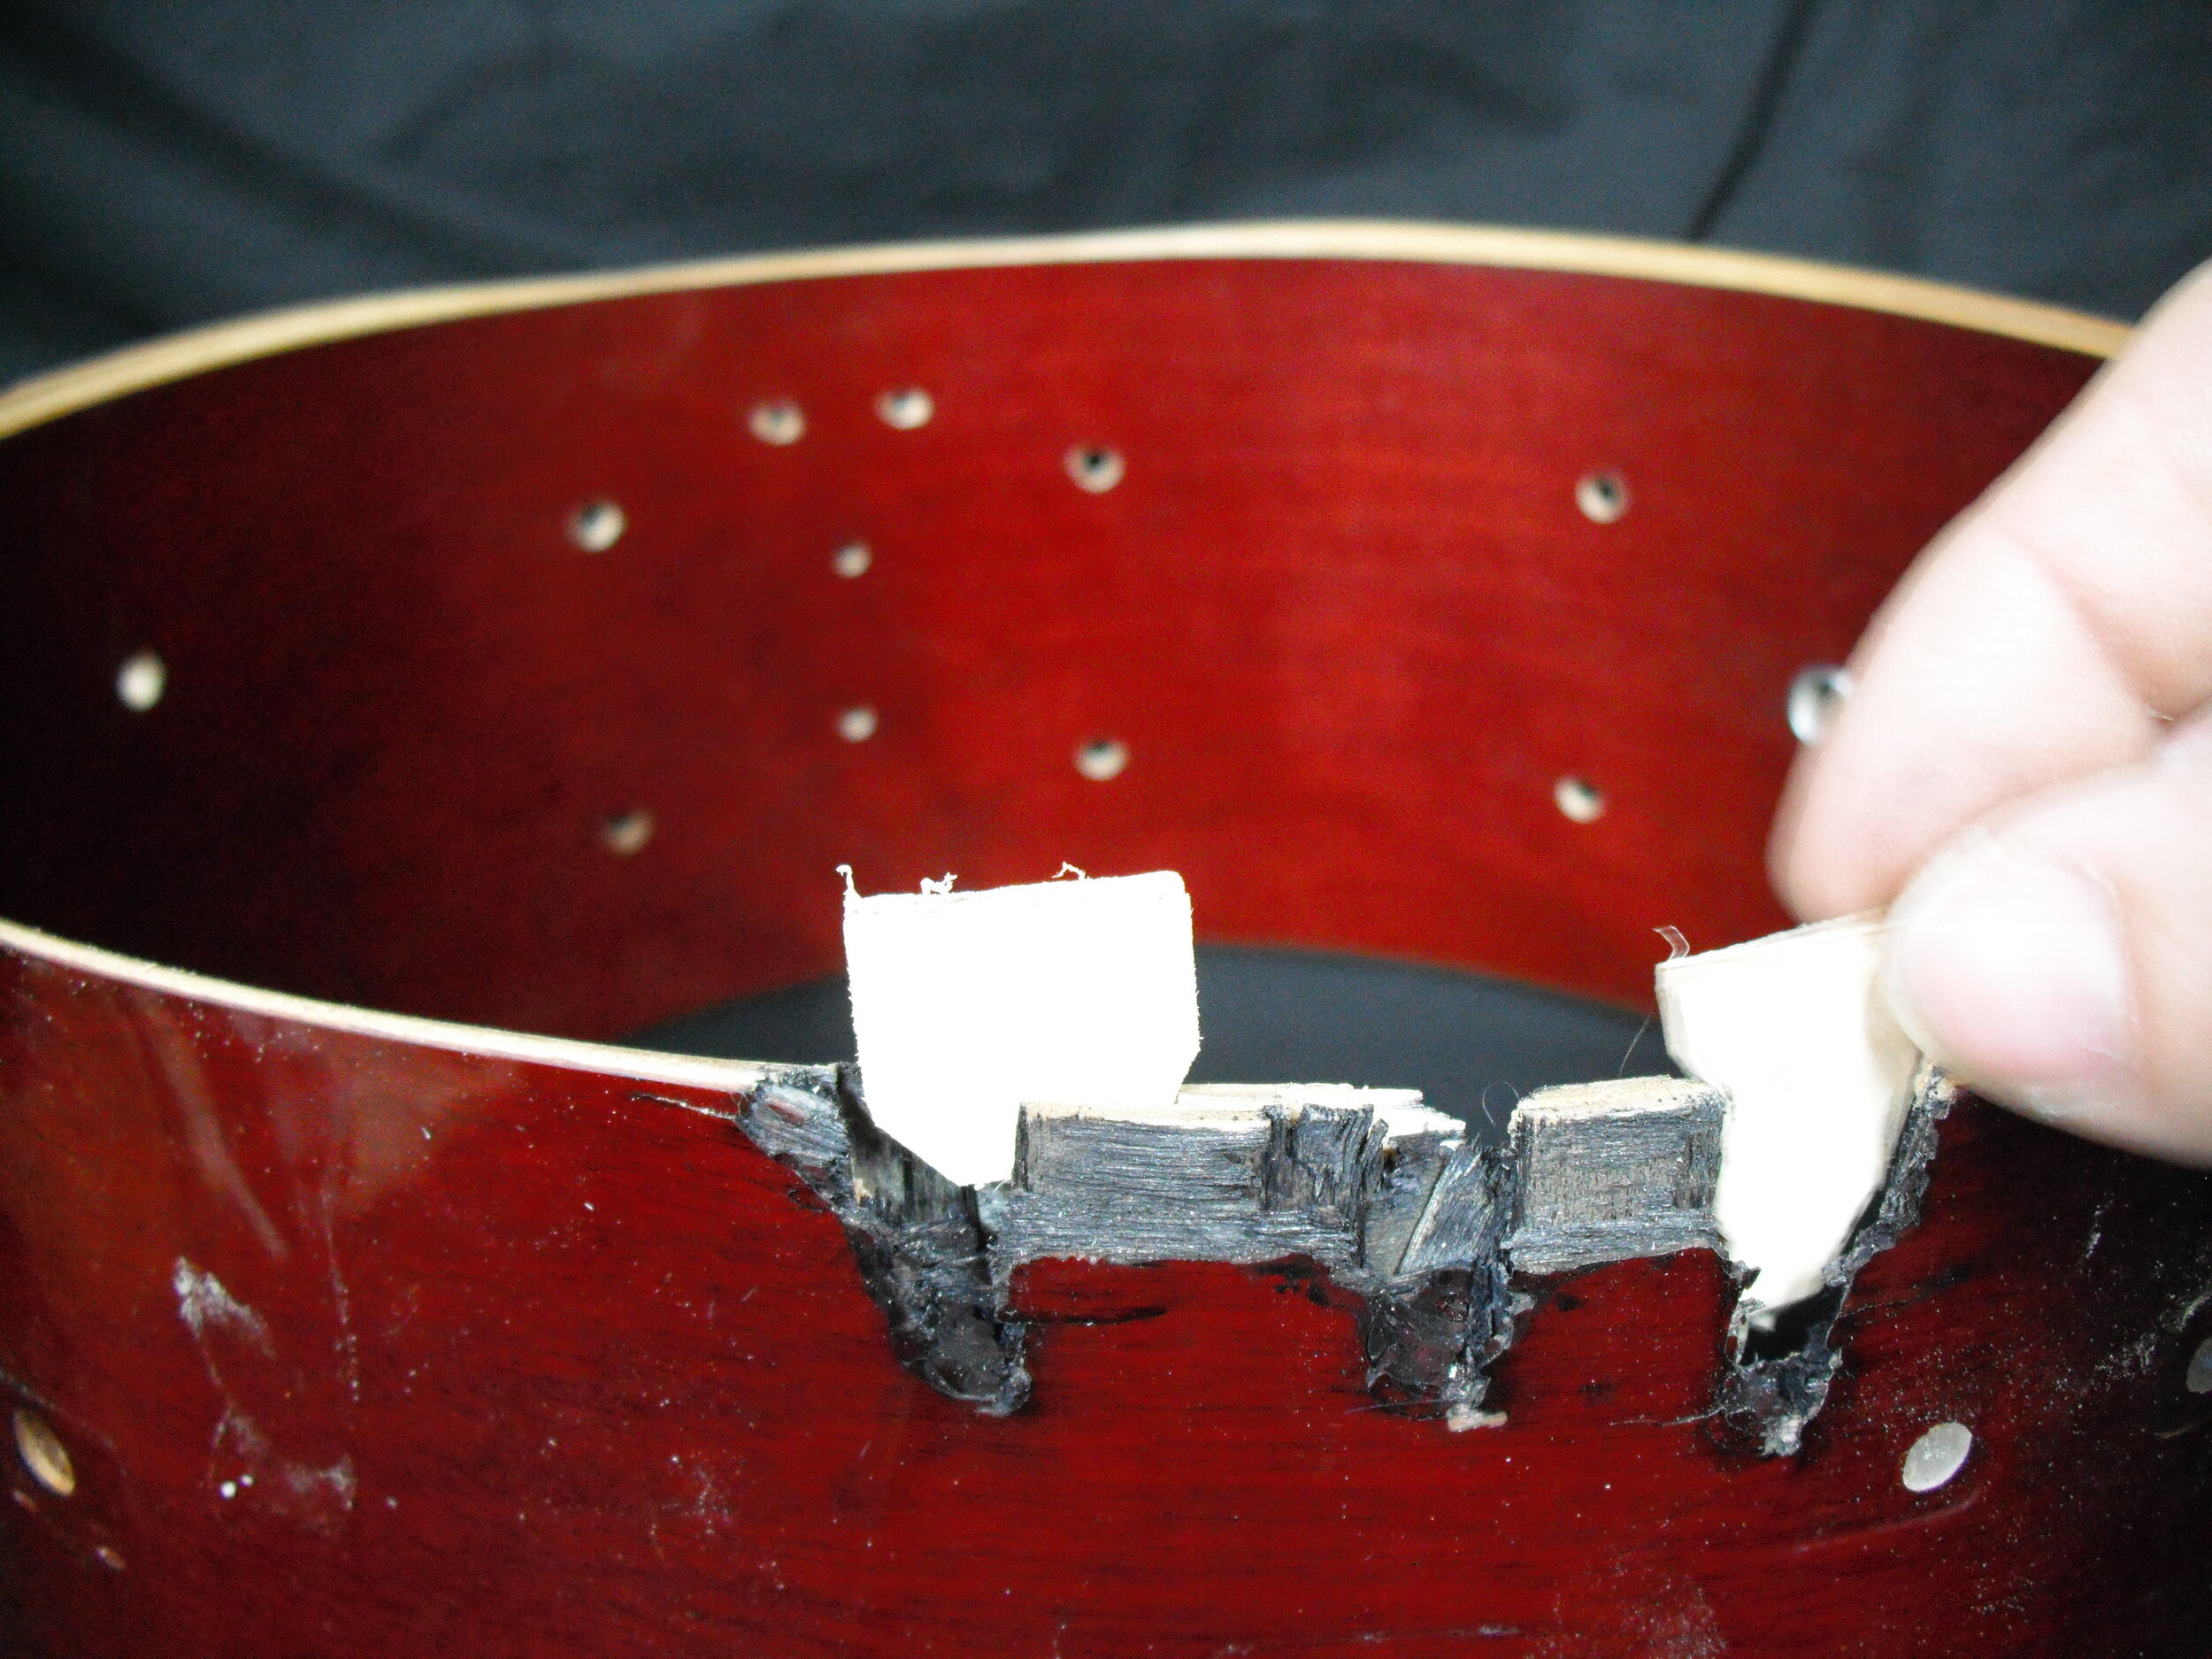
The drum is a 5.5 x 14 inch Yamaha upper-line plywood snare drum, 90's era, with a stained red mahogany finish. As you can see by the photos, the snare-side bearing edge was brutalized. At one of the snare beds, the shell laminates had been torn away and were missing in a V-shaped area roughly four inches long and extending to about an inch and a half from the edge near the snare gate. Besides this major damage, the bearing edge was pretty chewed up on another part of the snare side. The shell was mostly in round otherwise. It was not a pretty sight.
Keep in mind, just because something can be repaired doesn't necessarily mean it should be. The cost of these types of repairs can easily exceed the value of the instrument. Because these repairs usually involve sentiment towards the drum, I like to determine a cost ceiling before agreeing to attempt the work. This particular drum was not to be refinished, just restored to a playable condition. Most of the damage, fortunately, would not be visible once the drum is reassembled. I don't believe the sentiments toward this drum run very deep.
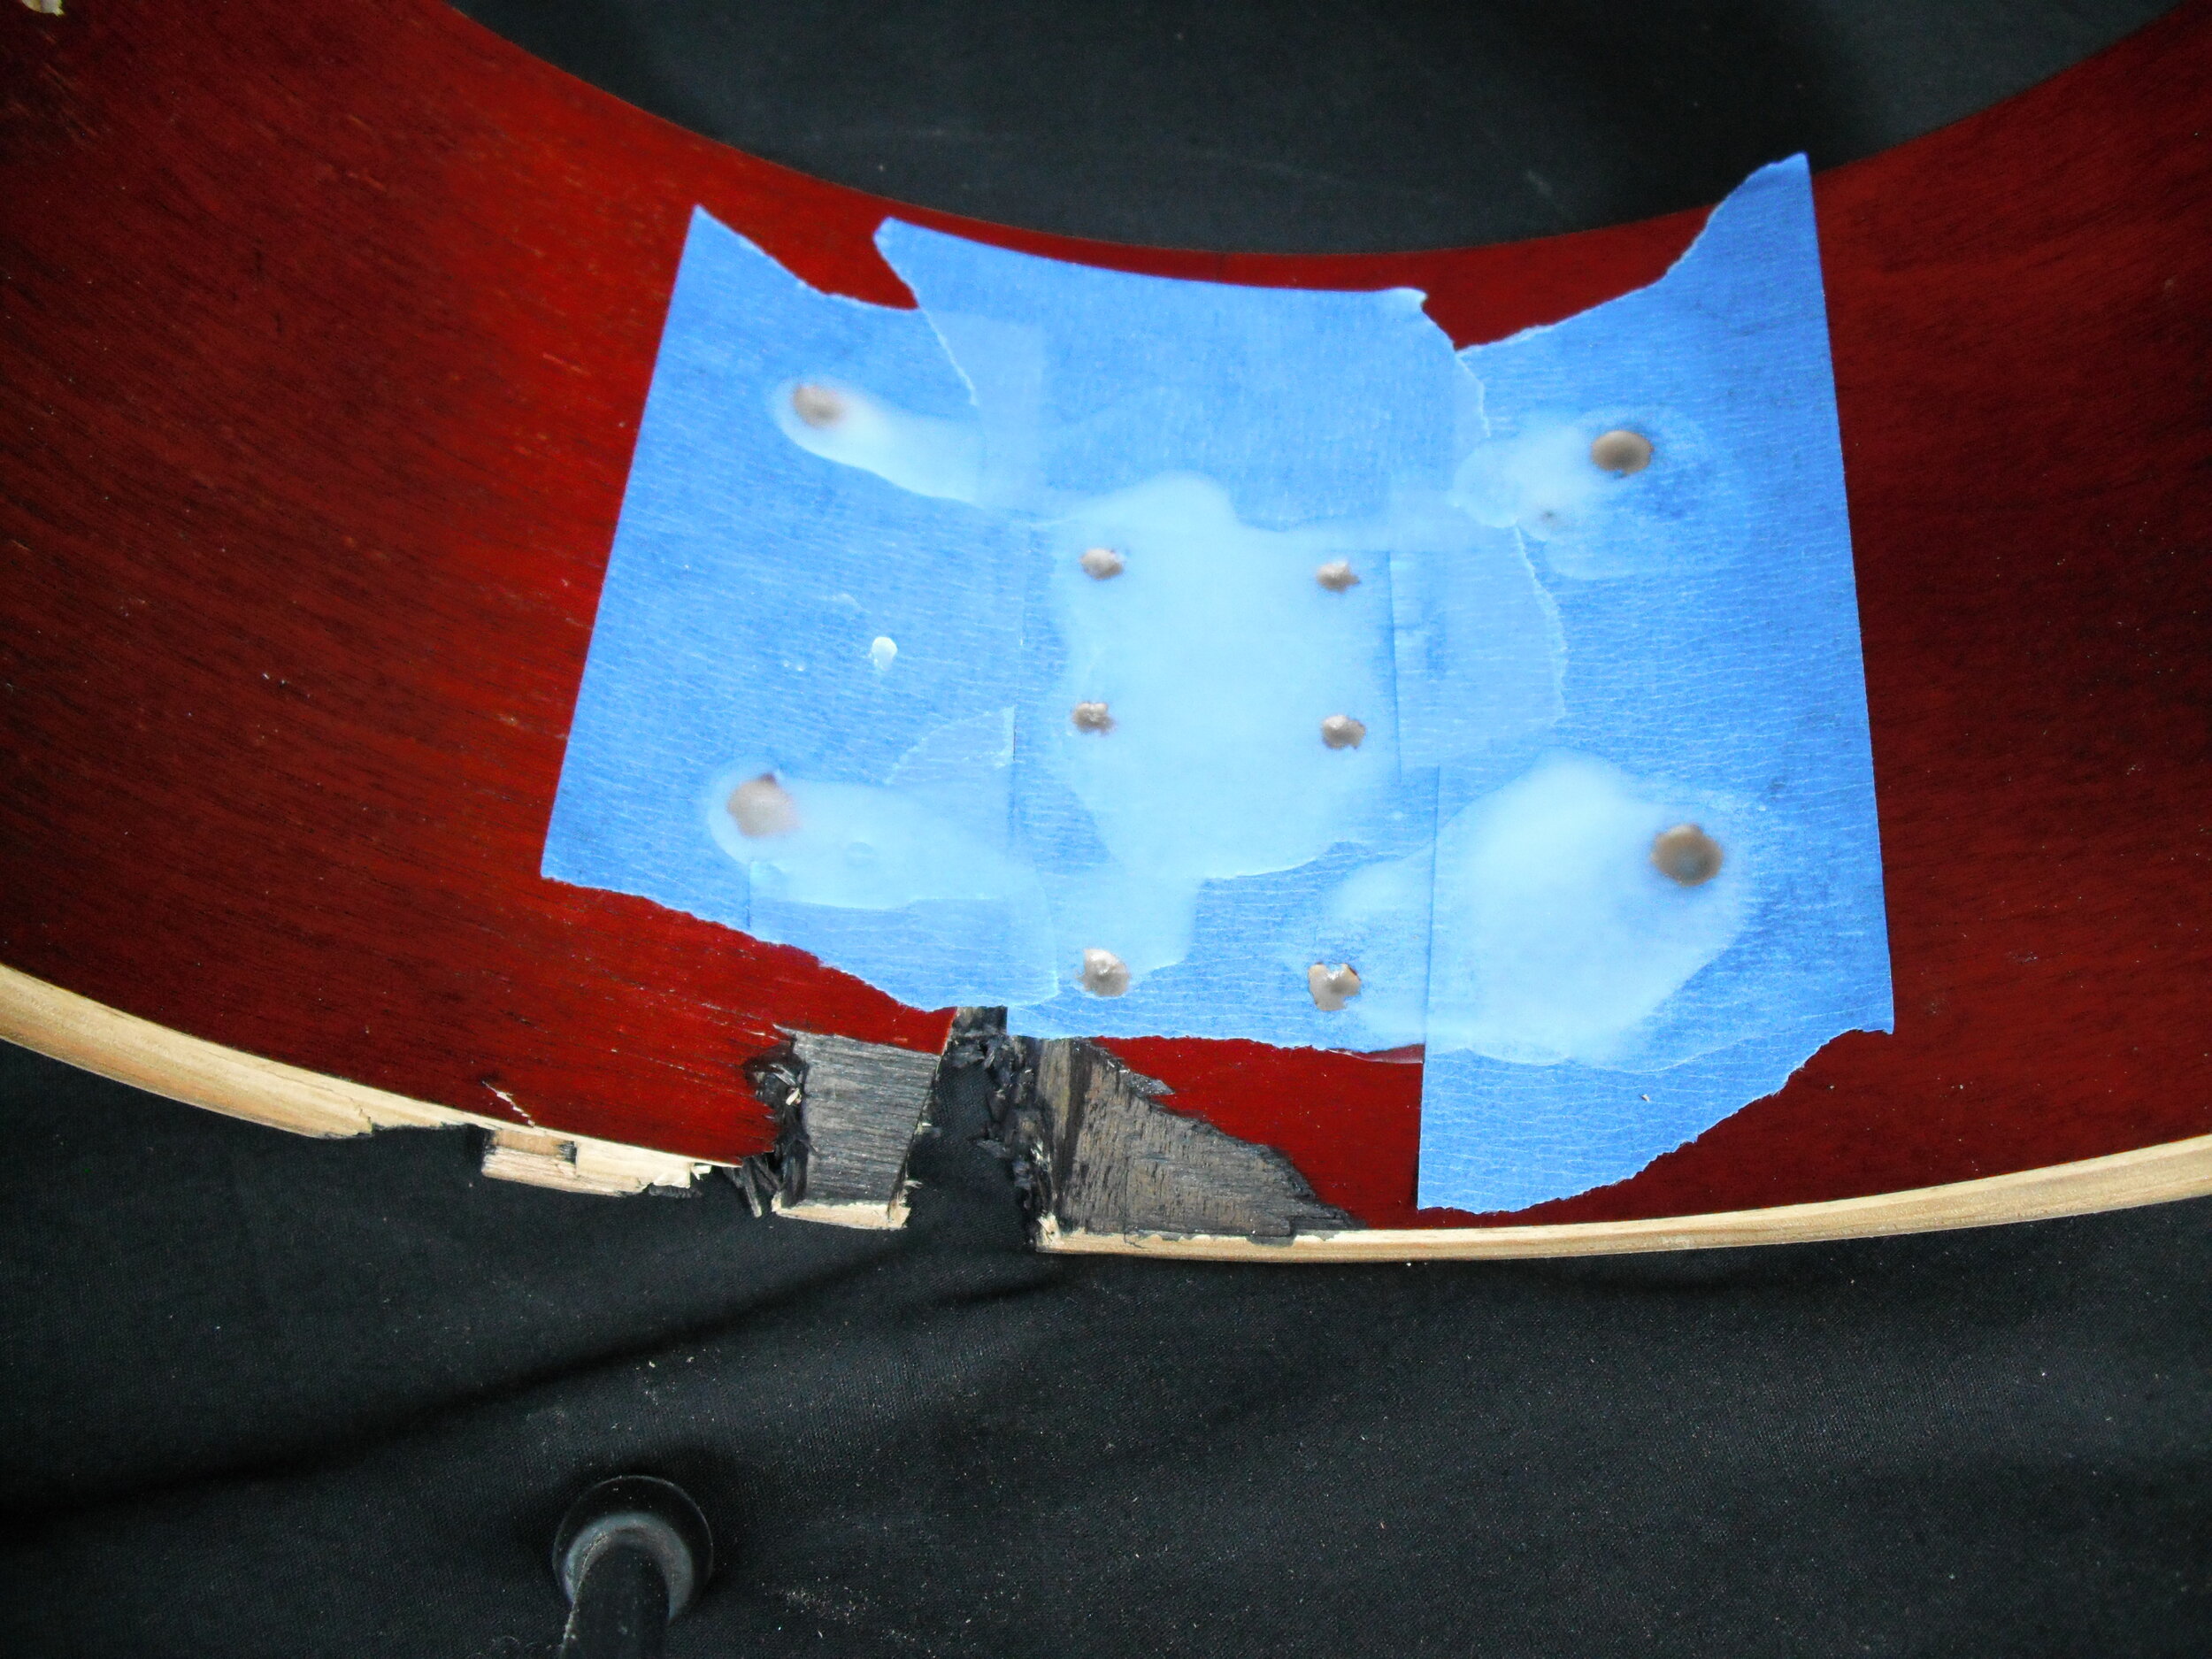
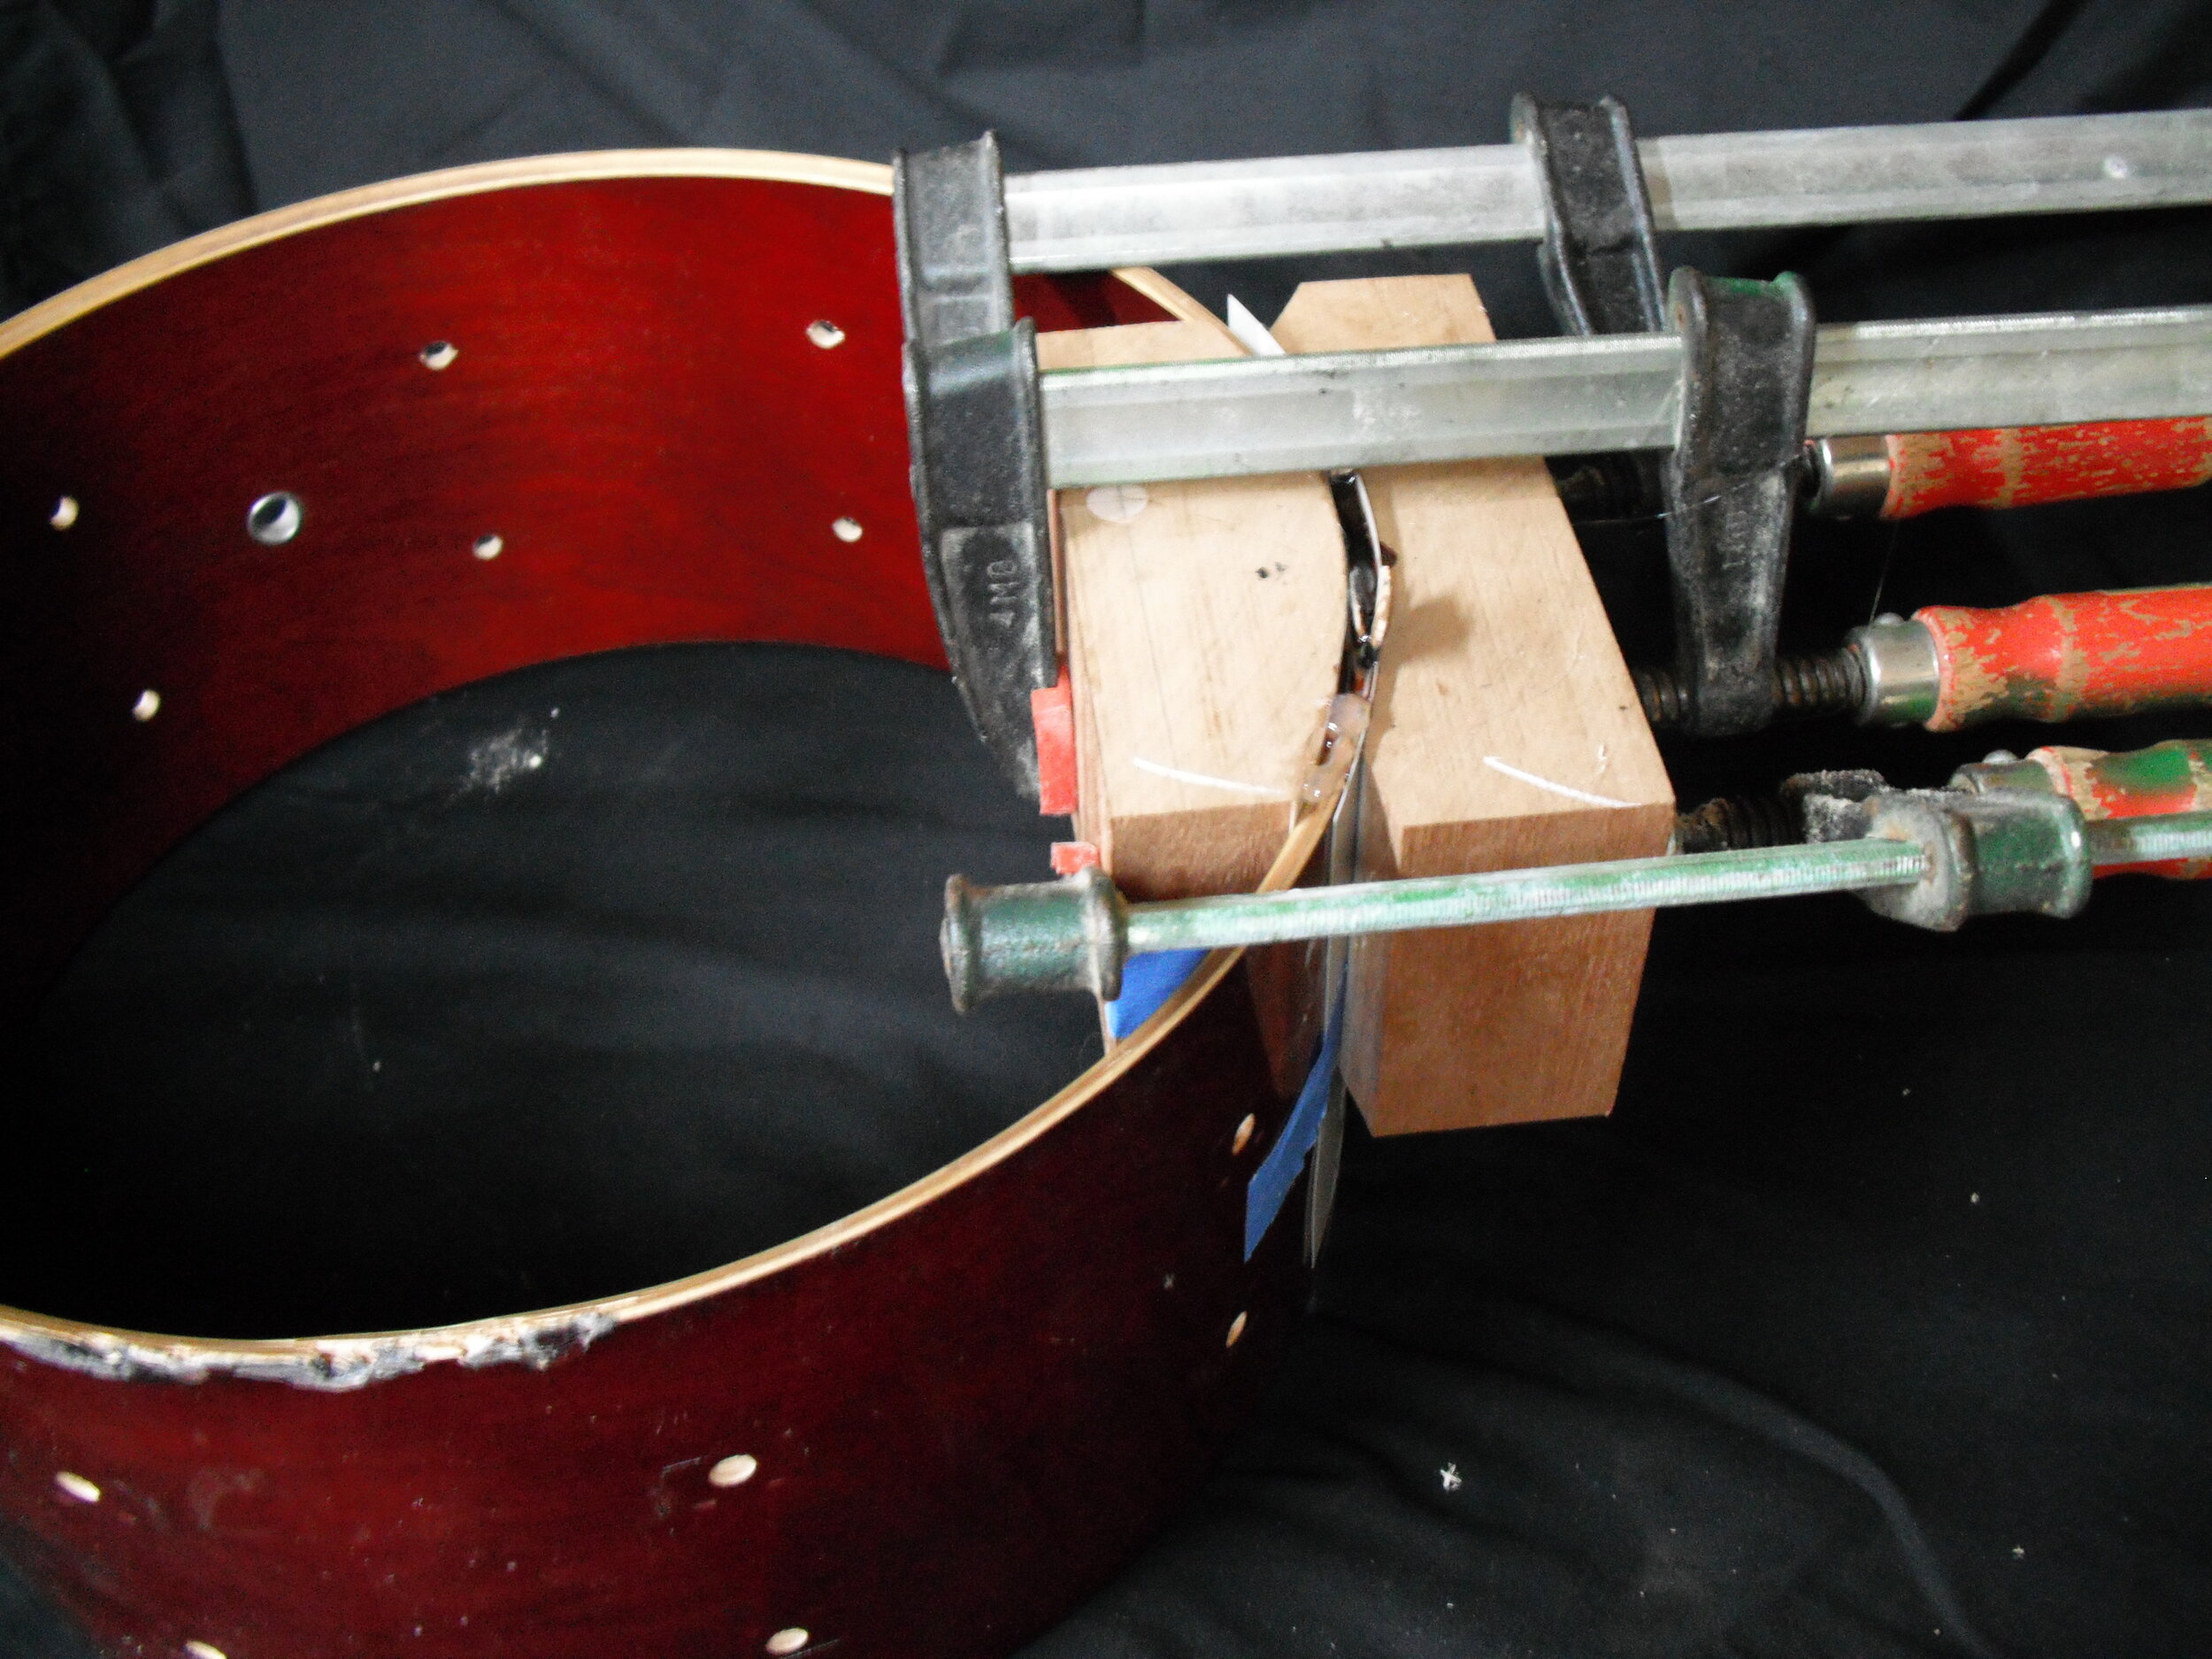
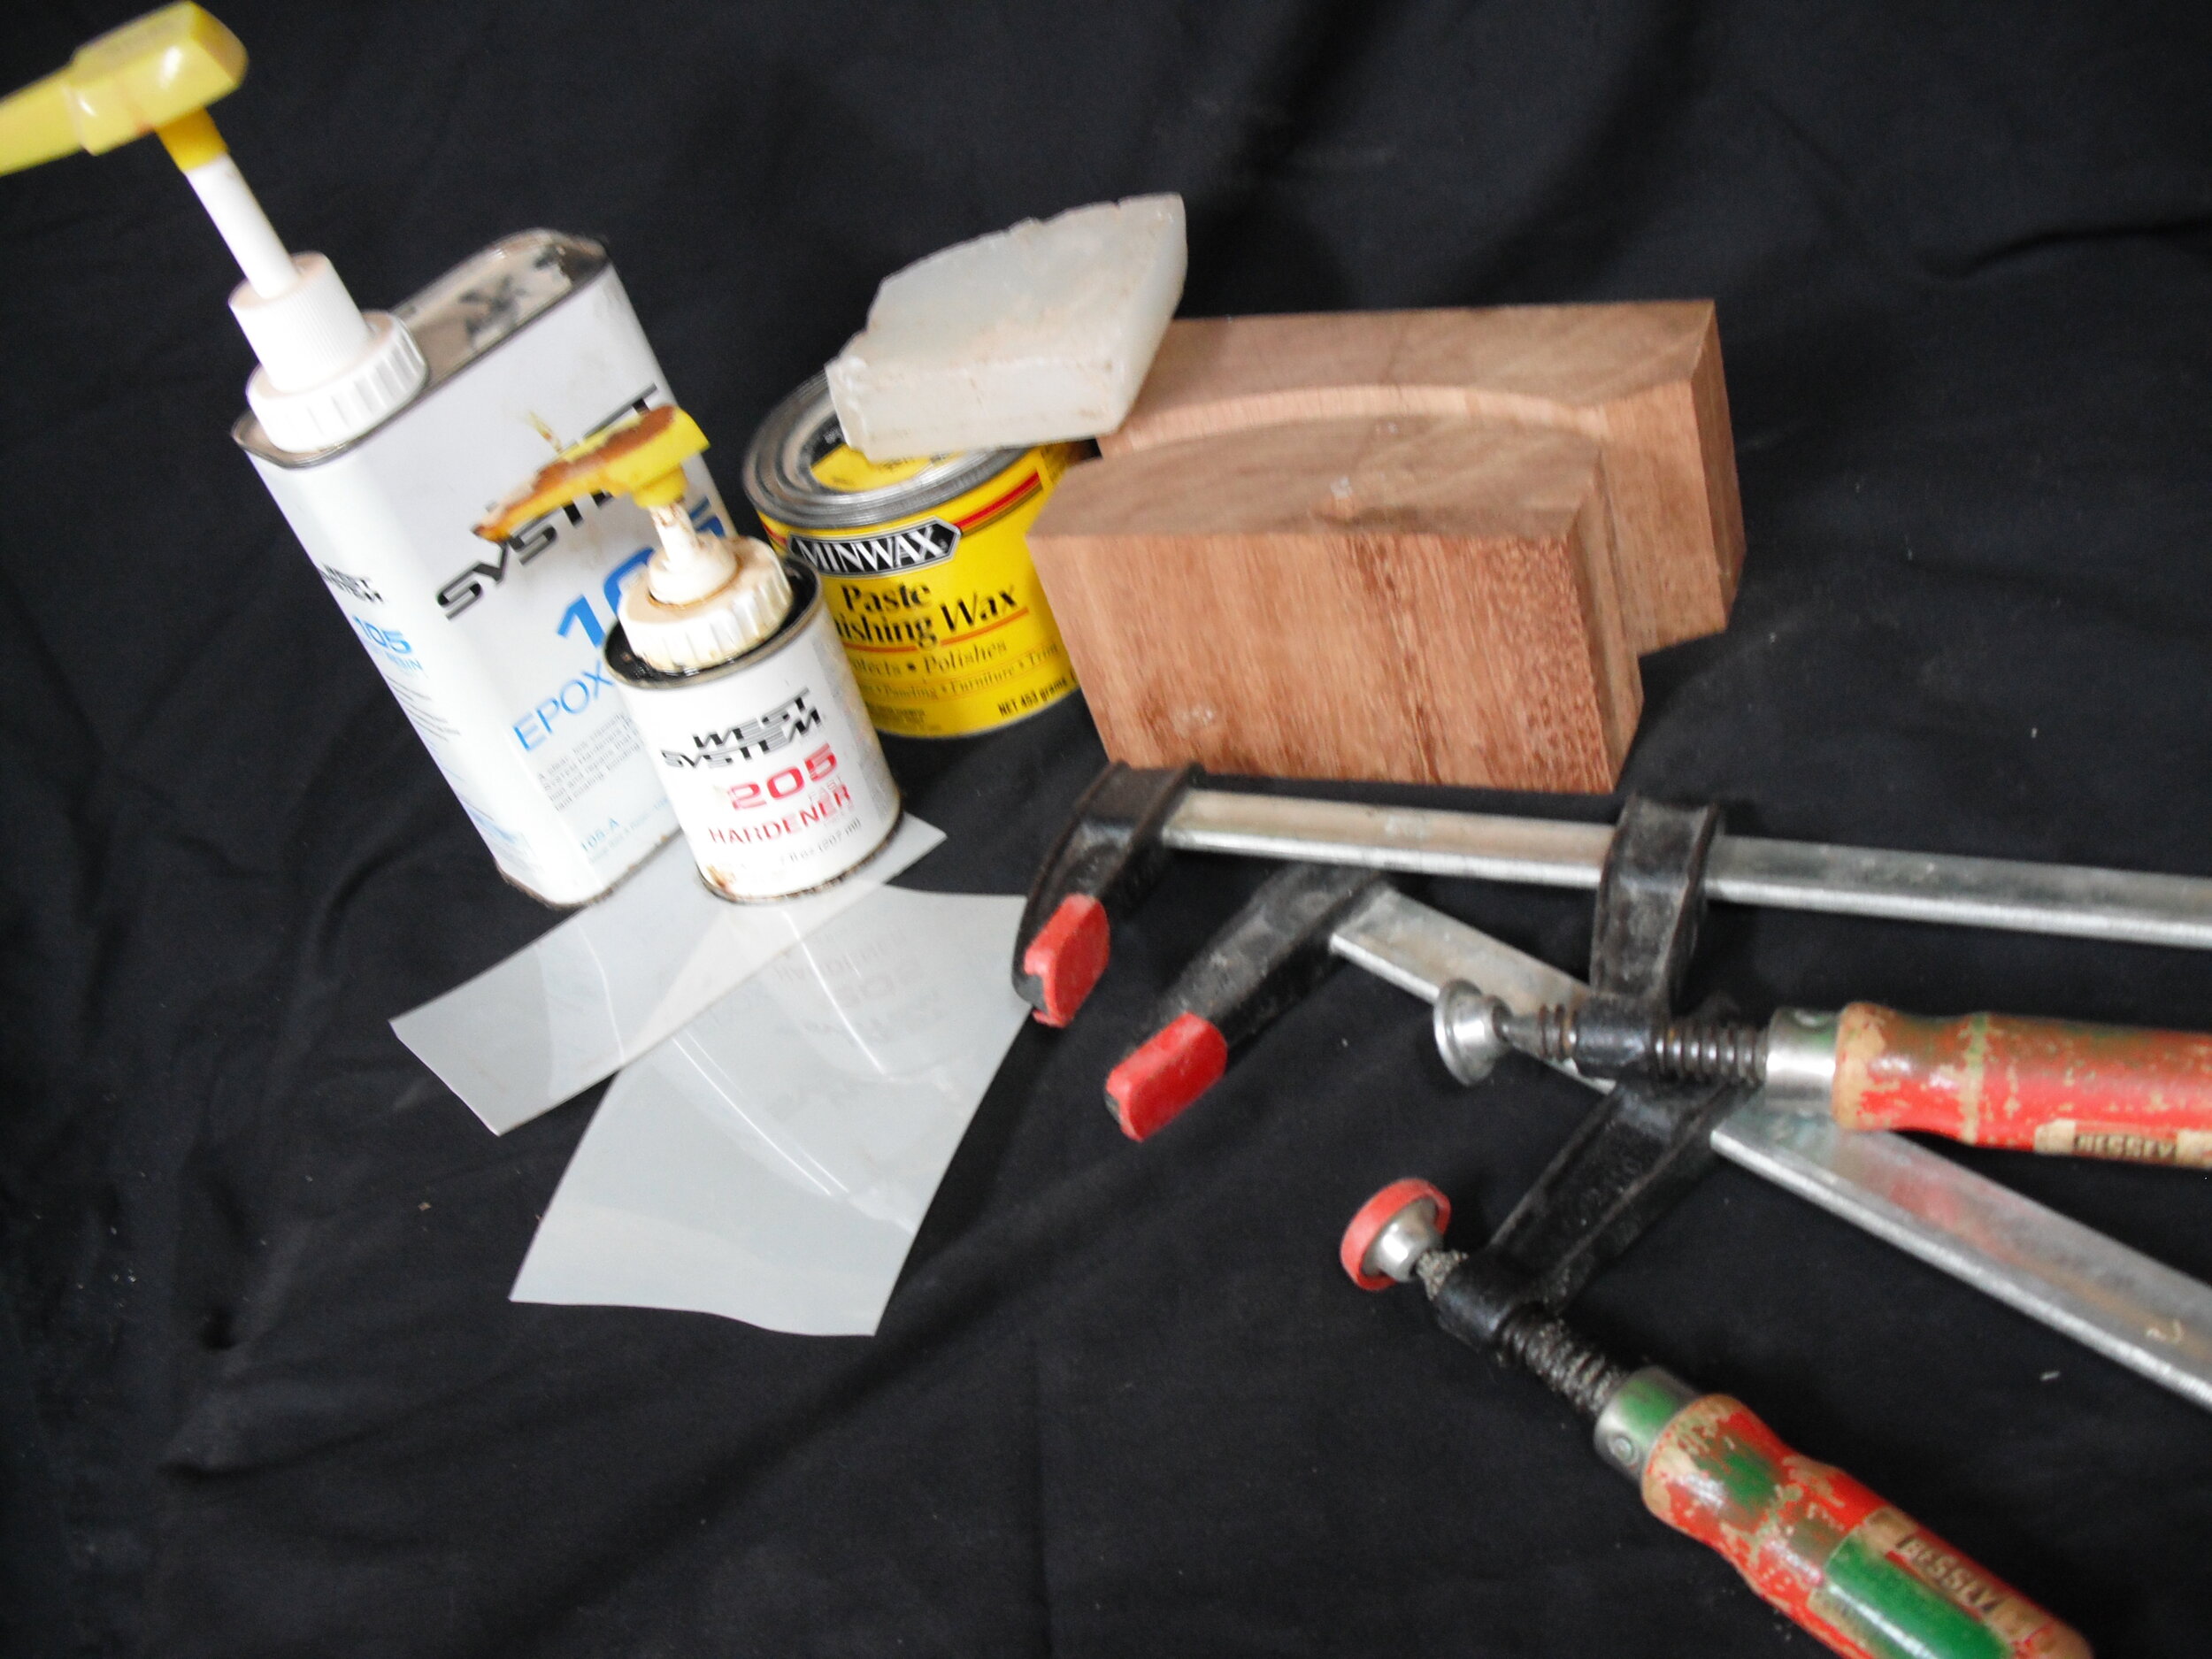
The first order of business is to fill the damaged area and essentially replace what is missing and do so without having to sand the repair afterwards. To accomplish that goal, I build a precise pair of hardwood forms with my bandsaw to reconstruct the shell. The forms also help reshape the shell and become a dam to contain the glue. Mylar strips are sandwiched between the shell and the forms to prevent them from sticking together.
I use pieces of plywood shell and marine epoxy to fill the voids. Marine epoxy is a thin, slow-drying material that is extremely hard when cured. Because of this slow cure time (several hours), a lot of precautions must be taken to prevent the epoxy from going where you don't want it. I tape around the screw holes that are nearest the damage and pour in candle wax to fill them. The wax will prevent the epoxy from seeping through the grain and into the holes. Believe it or not, this can happen. After cleaning off the excess candle wax, I also smear a finish wax around the area to be repaired to create a seal between the shell and the mylar. I sandwich the mylar between the forms about 1/4" above the bearing edge. I clamp it tightly to the shell and insert the birch filler pieces. To prevent the epoxy from running out either side, I use a hot glue gun to complete the damming of the area. I mix the epoxy and immediately begin the pour. I fill the dam just past the bearing edge. Dyeing the glue is an option but I find it unnecessary here. The epoxy is similar in color to the drum's finish.
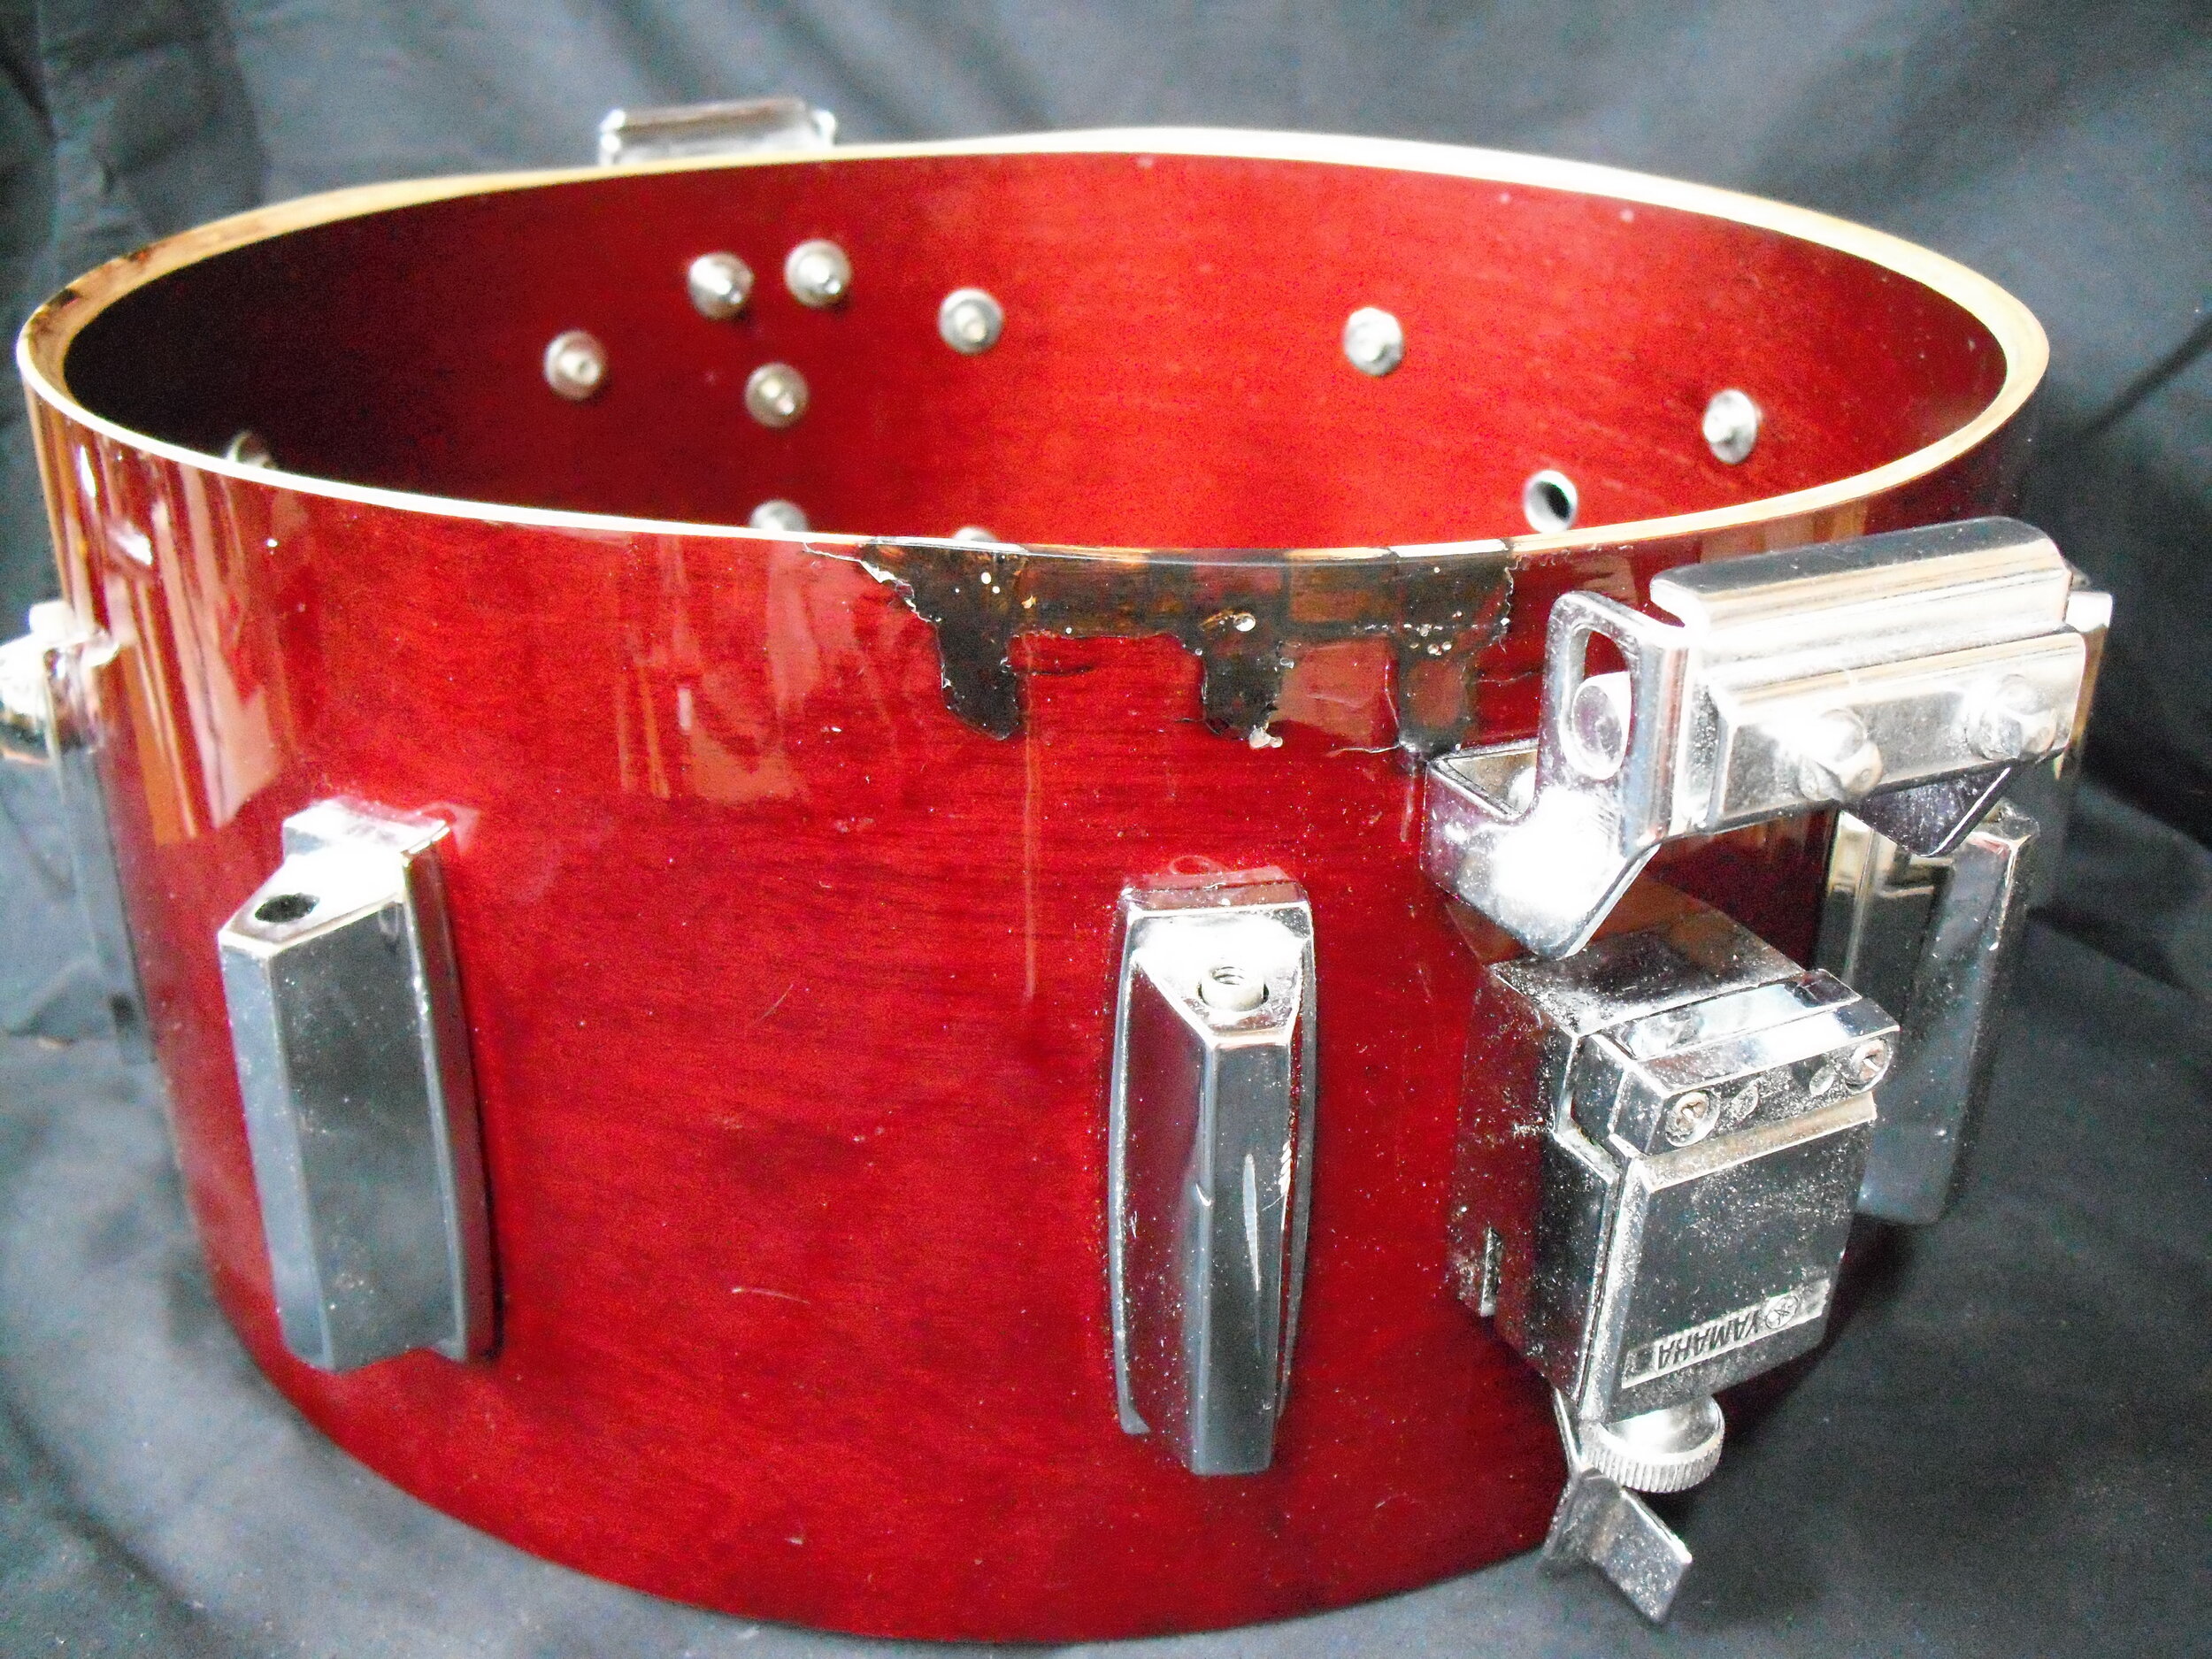
After the glue dries overnight, I remove the clamps and forms and repeat the process for the other damaged area. Once cured, I remove the form, clear out the candle wax, and clean off the finish wax in preparation to level and recut the bearing edge. Because part of the damaged area is on the snare bed itself, I trace the profile from the undamaged bed over the repair and cut it by hand with a file. I level the rest of the repair with a horizontal router and cut the 45 degree angle in the patched areas to match the existing edge. After that, it's a matter of sanding and burnishing the finished edges and replacing the hardware. Tada! It's a drum again!
Although this drum is scarred for life, it is once again a useable, functioning instrument in society. Any value it might have had may be gone, but its dignity remains. Along with perhaps the reminder of a night that went terribly wrong.
Parumpapumpum y'all