
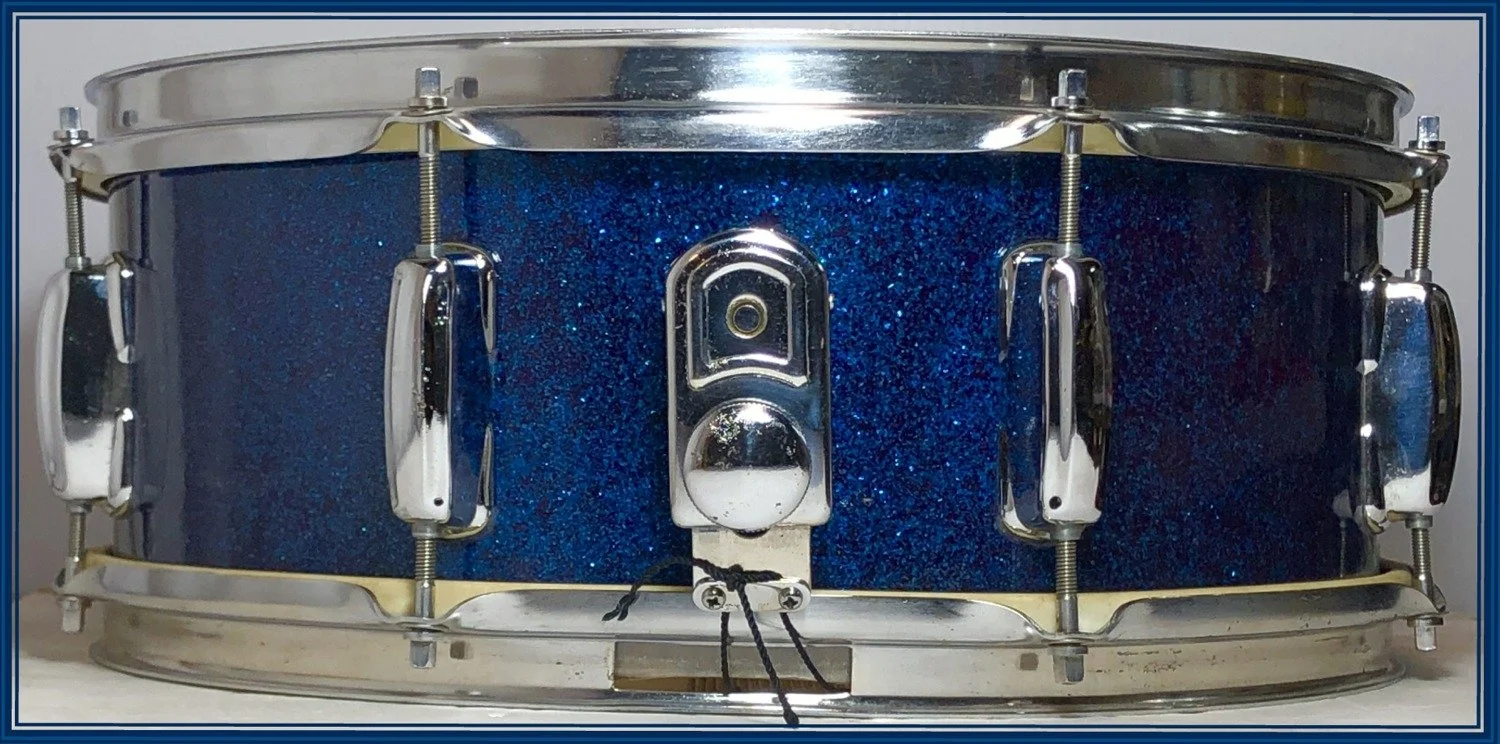
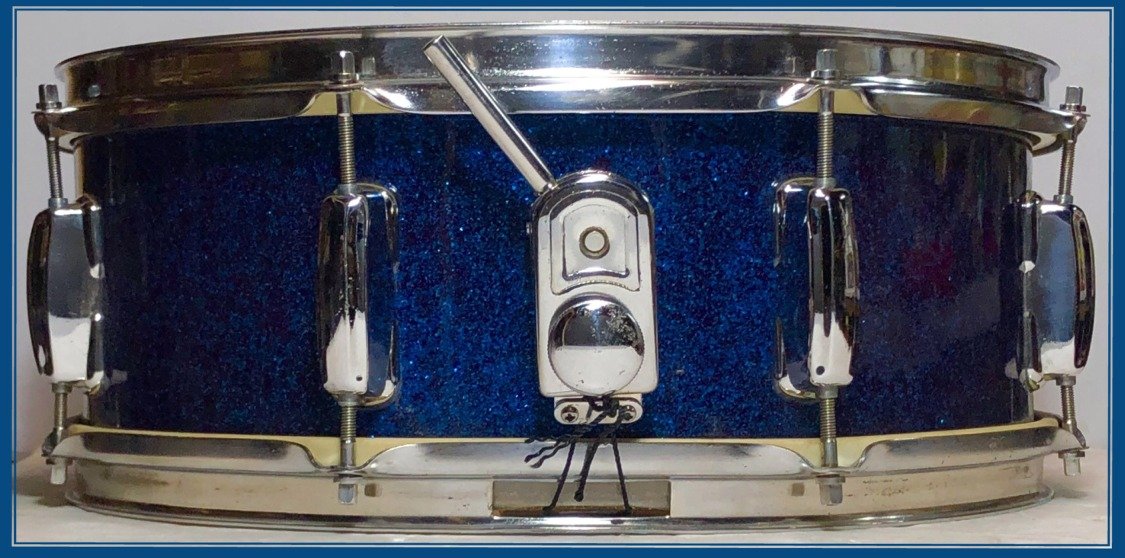
One of the most common sights to see on a Star made snare drum is a missing lever on a 930 Strainer. The overall design of the 930 was inspired by Slingerland’s Zoomatic. The big differences between the two are the pressed metal casing and the screw in lever by Star, both of which were a downgrade from Slingerland’s already poor design. Since this strainer was discontinued over 50 years ago, finding replacements is getting a little more difficult and most vintage drum owners don’t want to drill holes for a modern strainer, so I have a way to keep the strainer and just add a lever to it.
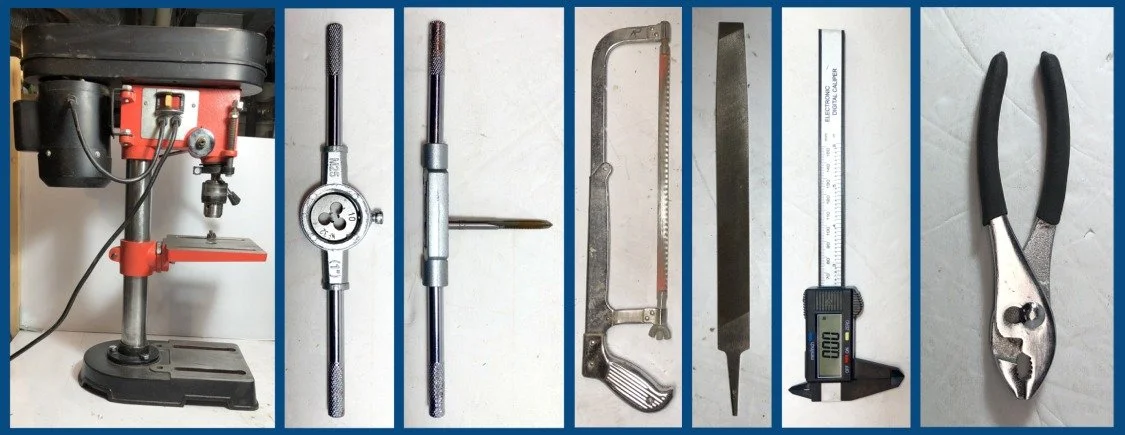
This little hack is for those with a standard stocked workshop. Some of the tools can be substituted, but it will slow the process down, but here they are: a Drill Press (a Hand Drill mounted to a work bench will also work), a Tap & Die Set AKA Thread Cutters (no substitutions for this), Hacksaw (or a Hacksaw Blade), File, Measuring Caliper, and Pliers.
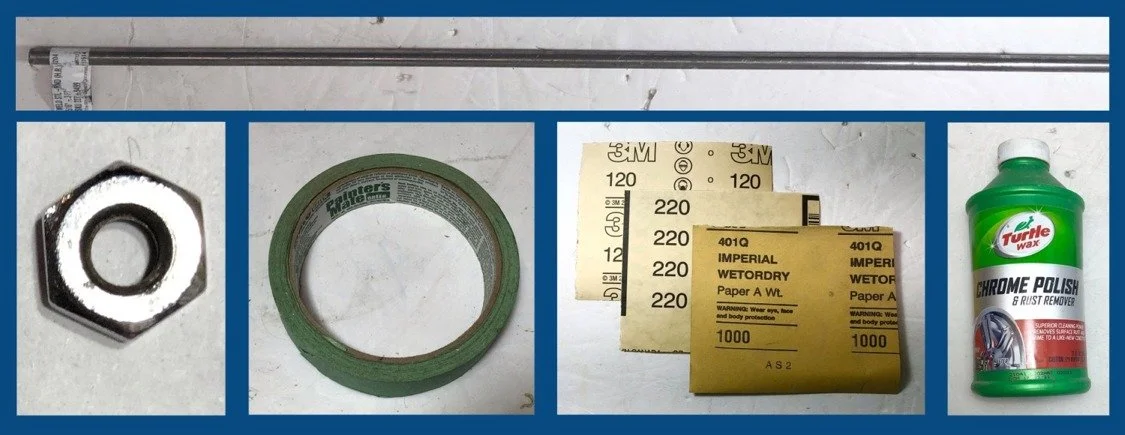
The supplies you will need: a Steel Rod, Hex Nuts, Masking Tape, Sand Paper (120/220/1,000 grit or similar), and Metal Polish or Buffing Compound.
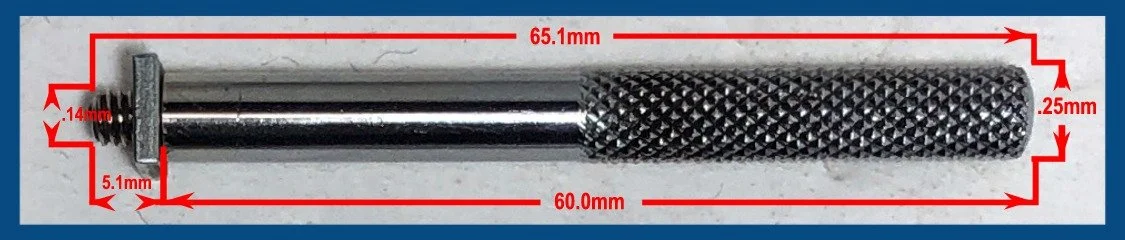
The original Star lever in metric is 65.1mm long, with the lever portion being 60.0mm, leaving 5.1mm for the threaded section. (30.3mm of the lever section is knurled.) The lever diameter 6.4mm (knurled) and 6.0mm (smooth). The threaded diameter of the lever is 4mm with a thread pitch of 0.75mm. The nut is 7.4mm square and 1.8mm thick.
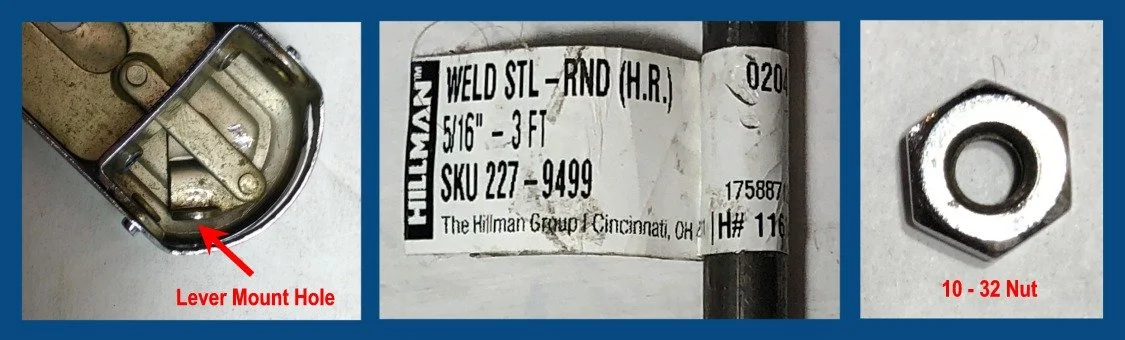
The hole where the lever mounts in the strainer is not threaded, and the original nut is long gone, so sticking with the original measurements is not necessary. For my application I’m using what is more common, imperial measured nuts, in this case a common 10-32 which is slightly larger than the original. For reasons I’ll explain later I am using an oversized rod of 5/16”. My local hardware store sells it as “Weld Steel Round 5/16” - 3 ft”, which costs about $6, (you can get about a dozen handles out of one rod).

NOTE: From this point on, everything will be in Imperial Measurements.
STEP 1:
Measure 2.60” on the rod and put a piece of tape to mark the line and cut with the hacksaw.

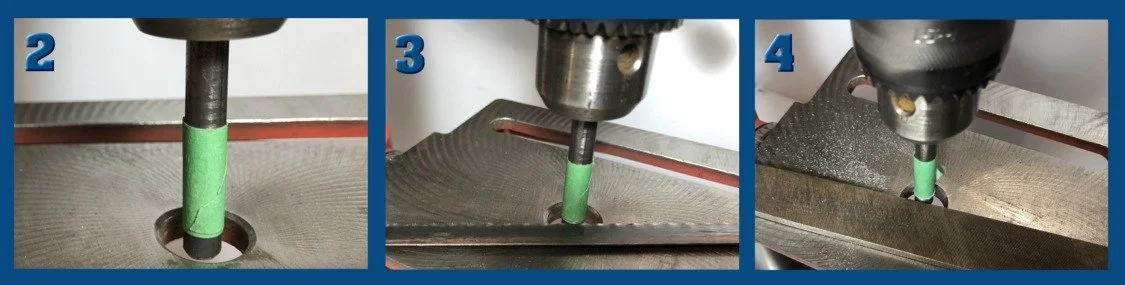
STEP 2:
Measure 0.28” from the end of the rod and tape it, then put the rod into the drill.
STEP 3:
Stabilize the hacksaw blade on the platform and cut into the rod about 1/16”.
(A loose hacksaw blade resting on the platform and moving back and forth cuts more quickly.)
STEP 4:
Adjust the platform and use the file in the same technique to create the threaded section of 0.14”.
STEP 5: Carefully grind away the hard edge into a cone shape (approximately 1/4”).
(The purpose for the shape keeps the lever in constant contact with the slot helping to prevent it from coming loose or even moving from vibrations.)
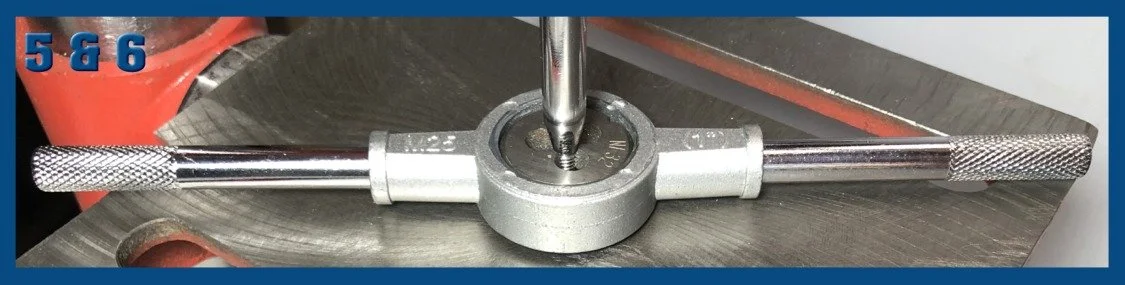
STEP 6:
Cut the thread using the drill press to hold the rod and mount the cutting tool on the platform.
(I put the chuck key in the chuck and use it to manually rotate the rod with one hand and apply pressure with the other hand.) (DO NOT try to cut the thread with the drill motor, it will strip out the threads.)
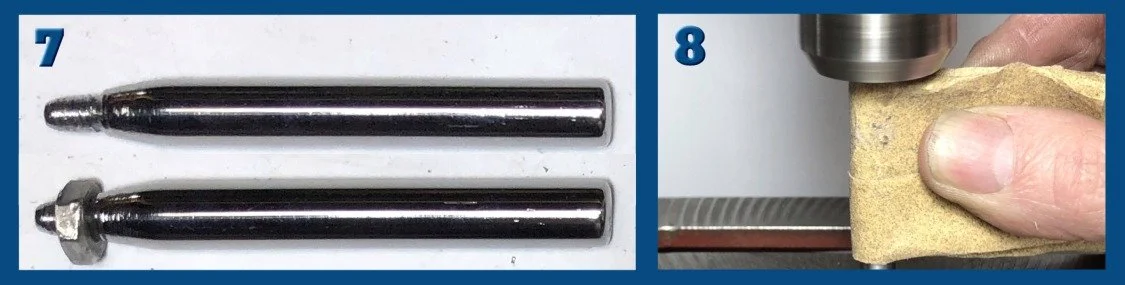
STEP 7:
Check to make sure the nut threads properly fit.
STEP 8:
Sand and polish the lever. Do all the grits and polish on one side then flip it over and do the same.
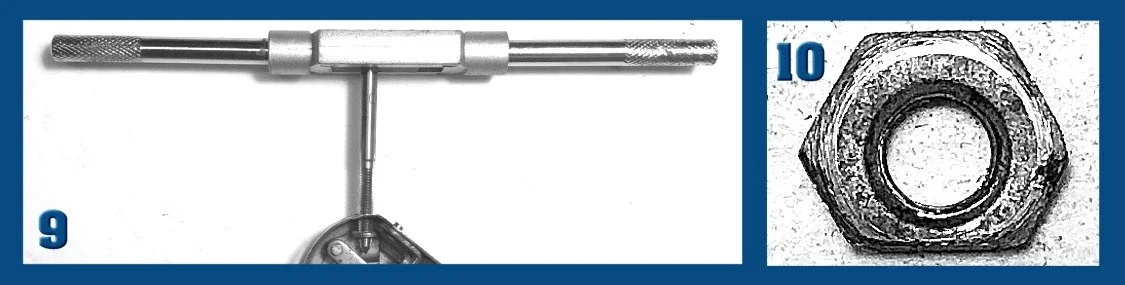
STEP 9:
Cut a 10-32 thread into the existing hole in the strainer mechanism.
STEP 10:
File down one side of the nut to where the holes line up evenly.
STEP 11:
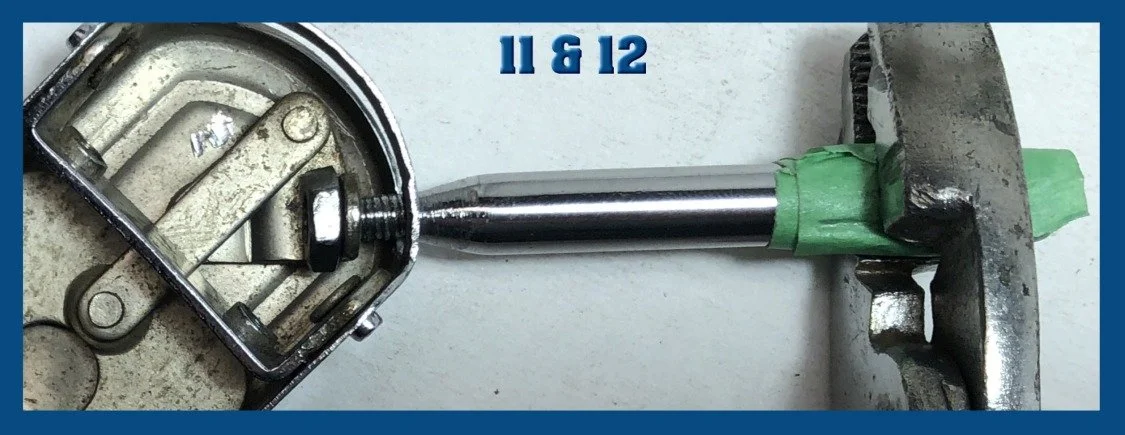
Apply a generous amount of tape on the lever to protect it for tightening.
STEP 12:
Place the nut behind the hole and thread in the lever through the hole and nut using a pliers on the tape to grip it.
You new lever will look slightly larger, and it won’t have the knurling, but it will be much more stable.

This hack isn’t just limited to the Star 930, but also works with Hoshino, Pearl, Sakae, the Star 940 and any other screw in lever.
This is my little PSA to try to keep extra holes out of vintage drums in the wild, and yes, I am guilty of putting extra holes in vintage drums, but if I can save just one drum, it’s worth it.